Blog
- MAKING YOUR FIRST WORKBENCH
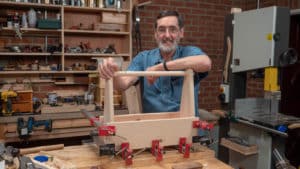
You’re learning the basics of woodworking but what more do you need to know to make your first workbench? Below are the 6 basic skills you need to have learnt and the 12 tools you should have and feel comfortably proficient with using and sharpening. The Paul’s Sellers workbench is not an advanced project but…
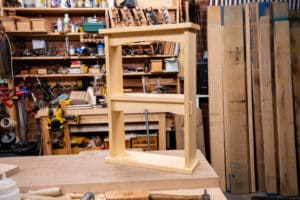
- How to Make a Wall Shelf: Episode 3

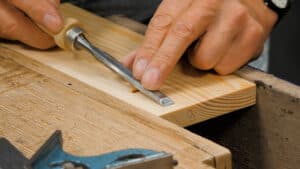
Two things Paul has always noticed to be intimidating to woodworkers are recessed or mortised hinge setting and applying finish. Following these steps will give you the confidence and success you want.
- How to Make a Wall Shelf: Episode 2
Two things Paul has always noticed to be intimidating to woodworkers are recessed or mortised hinge setting and applying finish. Following these steps will give you the confidence and success you want.
- How to Make a Wall Shelf: Episode 1

Two things Paul has always noticed to be intimidating to woodworkers are recessed or mortised hinge setting and applying finish. Following these steps will give you the confidence and success you want.
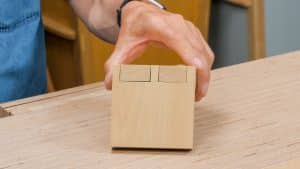
- How to Make a Shaker Candle Box: Episode 3
Two things Paul has always noticed to be intimidating to woodworkers are recessed or mortised hinge setting and applying finish. Following these steps will give you the confidence and success you want.
- How to Make a Shaker Candle Box: Episode 2
Many new to woodworking find the concept of hand-cutting dovetails intimidating, and yet it is one of the most fundamental joints used in the craft. Dovetails are the joints we use for making all kinds of boxes, large and small.
- How to Make a Shaker Candle Box: Episode 1
Many new to woodworking find the concept of hand-cutting dovetails intimidating, and yet it is one of the most fundamental joints used in the craft. Dovetails are the joints we use for making all kinds of boxes, large and small.
- “They’re just like the Aldi Chisels!”
Paul first tried out a set of chisels bought from the supermarket chain, Aldi 9 year ago. Paul was so impressed with them he bought enough sets for students to use in his woodworking school. “Aldi Chisels” has become a highly searched term by woodworkers looking for good quality cheap chisels. “They’re just like the…
- Consumables
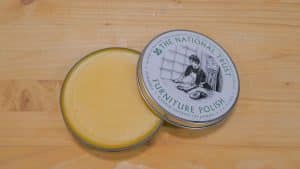
Furniture Wax Paul likes to avoid waxes with Toluene in as this can be harmful. Furniture wax can be applied as an frictionless polish on top of shellac. 🇬🇧 Paul uses this one from National Trust UK which costs £6.00* with £4.95 delivery. 🇺🇸 If you are ordering from the US, we are currently testing some…
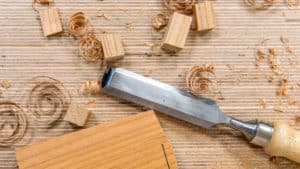
- Buying a Chisel
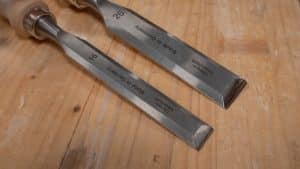
When buying chisels, you will usually find a set of 4 or a set of 6. The set of 4 includes the 4 most common sizes listed below and the set of 6 includes the two additional sizes: and 2 additional sizes Some chisels come with a plastic handle and some have a wooden handle,…
- Paul’s Top Woodworking Tips: Part 3
In this blog we are continuing to share some of Paul’s favourite woodworking tips he has collected over the years. You can catch up with part 1 and part 2 here. Poor Man’s Rasp Get a dowel (eg. a broom handle) and cut it in 2 lengthways, glue sandpaper around this to make a poor…
- Paul’s Top Woodworking Tips: Part 2
In this blog we are continuing to share some of Paul’s favourite woodworking tips he has collected over the years. You can catch up with Part 1 here. Removing a Buckle in Saw Plate To see if your saw is buckled, turn it so the teeth are facing up and look down the length. If…
- Paul’s Top Woodworking Tips: Part 1
Having worked with hand tools for over 50 years, Paul adopted many tips and tricks to help him in his everyday woodworking. In this blog post we’ve shared some of his favourites in the hope you find them useful too! Pulling a Plane Sometimes you can’t get your body in the right position to push…
- Have Your Say!
Is there a tool you can’t quite get sharp enough? A technique you keep trying but can’t master? Are your joints not coming together as you had hoped? You may come across several hurdles on your woodworking journey which are hard to overcome. We want to do our best to help you on your way…
- Woodworking in Small Spaces
Paul’s studio and workshop is the size of a single car garage, this is because we did a survey a few years ago asking what space you work in. Most people came back letting us know it was a double or single garage, but there were also people working in sheds and spare rooms too….
- 10 Free Beginner Woodworking Projects
Simple projects make for a great learning opportunity. Putting the joinery you have practised into a practical project can really help you understand the need for accuracy and square stock. Under the current circumstances, many of you have reached out to let us know that woodworking has been a welcomed distraction. We’ve put together a…
- Reading the Grain: A Beginners Guide
If you can understand what’s going to affect the hand tool that you work the wood with, you can shorten the time spent working against the grain. In this guide you will learn all you need to know about reading the grain, what it is, how to do it and why you need to do…
- Dovetail Troubleshooting- Part 2
We opened up our postbox for beginners to send in one of their first dovetail to get advice as to why it may not be the standard they had hoped for. Michael sent in his 3rd dovetail joint, he said he found sawing straight and cleaning up difficult. Paul identified that Michael had chosen a…
- Your First Woodworking Project
For someone getting started in woodworking, tools and skills may both be lacking so to get you started, we recommend starting with a project which doesn’t require many tools. The spoon and spatula are great learning projects as they involve shaping which builds skill. To make them, the tools you need are: Pencil Coping Saw…
- Sharpening Your Hand Tools: A Beginners Guide
Learning to sharpen your tools is a useful skill to have and one which we recommend you learn early on. It will save you lots of time if you’re using well sharpened tools and you will get cleaner results too. Paul recommends learning to freehand sharpen, however you can use a honing guide to help…
- Paul Sellers- The Lifestyle Woodworker
For those of you who don’t know, Paul Sellers is one of the best known hand tool woodworkers in the world. His knowledge and experience has allowed him to become a well respected figure in the world of woodworking. All the content on this site has been written alongside Paul to ensure we have created…
- Tips for a Beginner Woodworker
Getting started in woodworking? These top tips for a beginner show the importance of getting into good habits right from the start of your woodworking journey. 1. Make Sure you Have Sharp Tools This may seem like an obvious one, but having sharp tools will improve your accuracy and make the tools easier to use….
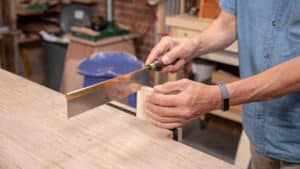
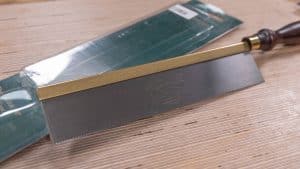
- Buying a Gent’s Saw
Paul recommends the 10″ (25cm) with 15-17 PPI. There are many different names on the saw plate but only one chief maker. They usually come in different lengths, but the 10″ is the ideal length. Also, small teeth (anything over 17PPI) is just too small and the cut is nowhere near as effective. It also…
- Get Started in Woodworking for under £100 ($121)
Starting a new hobby can be expensive, however with our buying guides, Paul advises you on buying the right tools for your beginners toolbox to help you get started in woodworking. To make the 3 main joints, you will need: Chisels– 1″ and 1/2″(Approximately £15 for 2) Chisel Hammer (£16) Combination Square (£10) Tenon or…
- Dovetail Troubleshooting- Part 1
We opened up our postbox for beginners to send in one of their first dovetail to get advice as to why it may not be the standard they had hoped for. One of our members, Jenny, sent in her dovetail in return for feedback from Paul which he critiqued in his YouTube video. We have…
- Woodworking Masterclasses or Common Woodworking?
With so much woodworking information out there, it is overwhelming for a beginner to get started. The aim of our site is to help new woodworkers learn the basics and to build skills which will enable you to feel confident enough to move on to more advanced projects in the future. Common Woodworking was made…
- How to do Woodworking Without a Workbench
Our recent survey found that over 30% of the Common Woodworking audience didn’t have any kind of workbench. To many, this will be the obstacle standing between them and practical woodworking. However it is possible to begin your woodworking journey with nothing but a small collection of tools (see our buying tools guides for more…
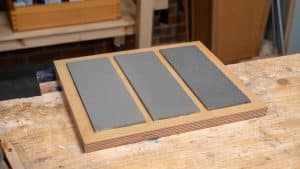
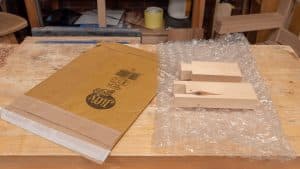
- How to Make a Sharpening Stones Holder
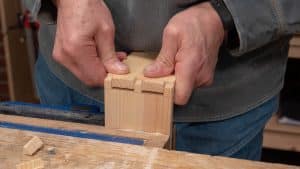
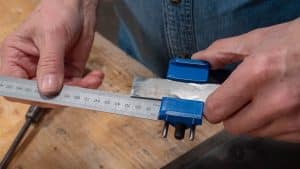
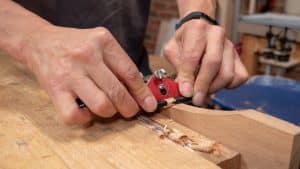
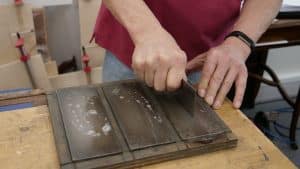
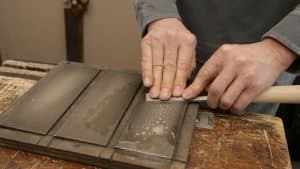
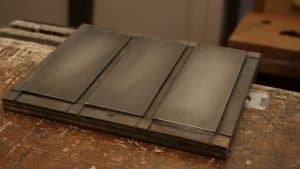
In this guide, Paul shows you how to make a sharpening stones holder which can be clamped in the vise for ease of use. For this, you will need: Laying out the Recess Positions Measure ¾” (19mm) in from each edge to create a border, put one of your diamonds stones on this border line…
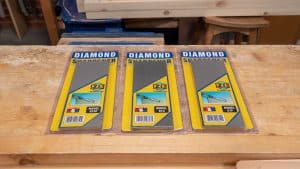
- Buying Diamond Stones
When buying diamond stones, Paul suggests getting a coarse stone between 120-400 grit (250 is best), a fine stone between 600-1000 (600 is best) and a super-fine between 1200-1500 (1200 is best). Paul recommends the 3” (76mm) x 8” (203mm) diamond stones from EZELAP, this width is so you can comfortably fit the width of…
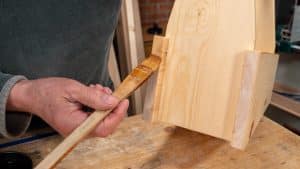
- How to Apply Shellac
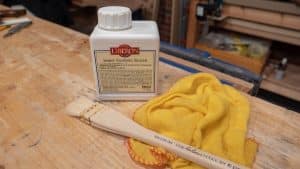
In this guide Paul will show you how to apply shellac to your project, this can be adapted depending on the project and the coverage you want to achieve. Before applying finish to your project, make sure you have removed any dried glue as this will be visible on your project after the finish is…
- Want Feedback on Your Dovetail Joinery?
Please note this opportunity is now closed. We have created our step-by-step courses to suit beginner woodworkers, they have visuals accompanying each step along with a written description breaking down the process. However, you might find that you’ve followed all the instructions but your joint still doesn’t seem to turn out the way you had…
- Using Registration Faces
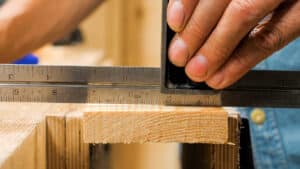
This exercise will focus on using two registration faces to mark around your wood which will help when you need to crosscut wood to length, which requires an accurate knifewall on all faces to prevent tearout. It will also help you to understand how to mark around a piece of wood when defining a knifewall…
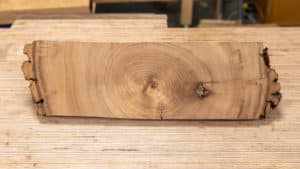
- How To Choose Wood
We have listed the common characteristics of each wood group to help you choose wood, although the following applies to the majority of hardwoods and softwoods, there are some exceptions. Which wood is best for indoor use? Generally you don’t have to worry about durability for indoor use unless it’s being used a lot and…
- What Level Woodworker Are You?
We recently put out a survey to find out a bit more about our sites users. We asked what level each user considered themselves and what projects they have made, if any. The feedback was really useful as it gave us an insight into how our users defined ‘beginner’, ‘intermediate’ and ‘advanced’. There was such…
- Using a Honing Guide
Paul doesn’t consider these an essential tool, however he understands that some beginners may not feel comfortable starting with freehand sharpening. The honing guide is useful if you want to achieve an exact angle, however there is a bit of leeway when sharpening as chisels can be sharpened anywhere between 25-35° and plane blades can…
- Gluing Up a Table Top (and Other Wide Boards)
Ensure all your boards have been trued and are square, to see how to do this, see our Truing Stock guide. For this you will need: Lay the boards flat on a large surface such as the workbench top to decide their configuration. Then, put your boards together and align the edges on two pencils….
- How to Make a Rag-in-a-Can Oiler
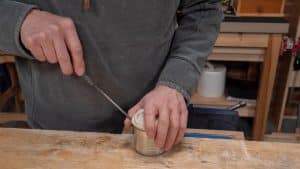
Note: Some oils spontaneously combust, see Paul’s blog post here, do not use these in the rag-in-a-can-oiler. Equipment Needed: Use a chisel hammer in the vise and a steel hammer to remove the sharp inside edge, make sure you are resting on the metal part of the chisel hammer, not the nylon or rubber face….
- Spokeshave Control
These exercises will work on your control of the flat-bottomed spokeshave and establish good patterns for continuously reading the grain: Convex and Concave Chamfer Stop- Chamfer Rounded Edge- End Grain Rounded Corner- Along the Grain For these exercises you will need: Convex and Concave 1- Start by driving two panel pins into your wood, 1”…
- Where to Start
With a new year comes new resolutions and we hope woodworking is one of yours! It can be daunting starting a new hobby, especially with all the information on the internet, it can be difficult to know where to begin. We want to help those new to woodworking get started by guiding them through the…
- New Year, New Projects

As the new year approaches we have been reflecting on everything we’ve done these past few months. It’s been a busy time for us as we’ve moved to our new building and built our custom garage studio which has enabled us to up our content quality. We also officially launched Common Woodworking, the response has been…
- Sash Clamps
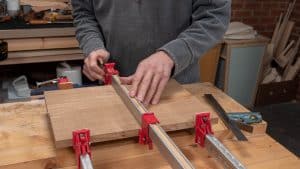
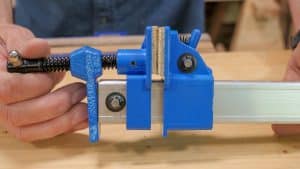
Sash clamps are used to hold together projects for an extended period of time, this is usually when gluing up to ensure the parts don’t move while the glue dries. They can also be used for temporary assembly (dry assembly) and to hold the components in the vise and on the bench top. As wood…
- Cutting with Crosscut and Ripcut
You will need: Ripcut Note: Paul advises that whichever way you load the wood in the vice, you should feel the wood is secure. He often puts the wood in different directions according to the length and the width of the wood because one way may give better access over another. Crosscut When using a…
- How to Choose a Wood Finish
Note: This guide was updated on the 26th February 2019 to include more specific examples. Before finishing, sand your project or section with 240 grit sandpaper, this gives the surface texture (also known as ‘tooth’) and gives the finish something to cling to. If your wood is oily, (like teak or rosewood) often we would…
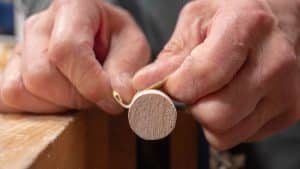
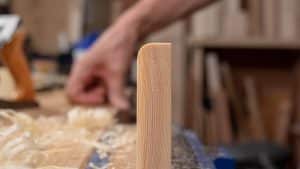
- Round Rod
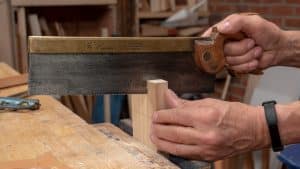
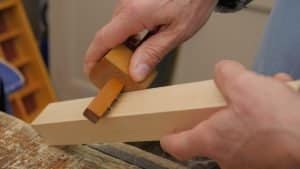
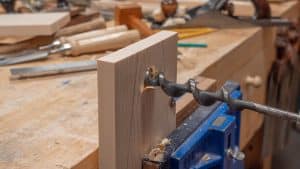
For this, you will need: 1. Once you have cut your wood to a square section, you can use a coin to draw around on the ends. An alternative method would be to use an appropriately sized brace bit to score the surface and mark the circumference. To do this, use a steel rule to…
- Roundovers
Note: Roundovers are used on edges that have the potential to wear, splinter and break with use. Rounding these edges or corners gives you a more solid and resistant structure. Here a plane works well instead of a spokeshave as it has a longer sole to register on the wood. Also spokeshaves tend to follow…
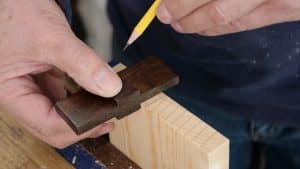
- How to Make a Dovetail Template
Note: This guide will show you how to make the handy, reusable template which will help in dovetail layout to save time and ensure accuracy. Once you have made one, test it out by using our free Dovetail Course. For this, you will need: Make sure all your faces have been trued, to see how…
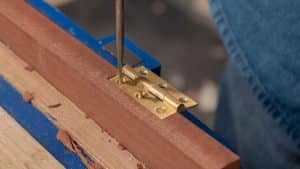
- Setting Hinges
Note: Before setting your hinges, if there is more than one, check them over to ensure there are no major discrepancies in sizing between the two. Whereas some hinges are made to tight tolerances, some are not, in which case the recesses must be customised to each specific hinge flap to guarantee a good fit….
- Preparing Your Wood
Preparing your wood is also referred to as truing your stock. For this exercise you will need: Wood (size will be dependent on the project you are working on)PlaneSteel RuleWinding Sticks (you can make them using this video or you can use the ‘poor mans’ version Paul uses in this guide)PencilSquareGauge All stock must be trued…
- What’s New?
Since our launch date we have published many more free guides, exercises and courses. We really appreciate anyone who has got in touch over the last few months, your feedback has been used to help improve both the site and our content. Incase You Missed It New Guides The Strop Guide- This guide shows you…
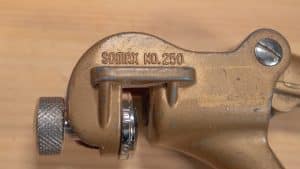
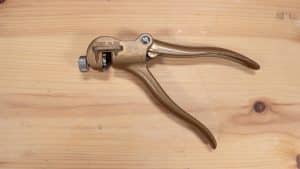
- Buying a Sawset
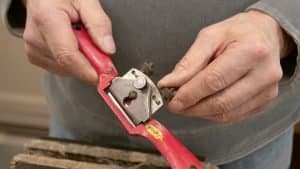
Paul recommends buying a secondhand sawset as they are cheaper and rarely wear out, these are readily found on eBay and also in secondhand outlets such as flea markets and car boot sales. When buying a secondhand sawset, check there is a spring in between the sawset handles before purchasing. Avoid Eclipse plastic handled sawsets…
- Using a Sawset
When using a sawset, start at one end of the saw and work your way down, setting each alternate tooth so you don’t lose track of your pattern (ripcut/crosscut) and end up setting the teeth in the wrong direction. Set every other tooth one way, then turn the saw end for end and repeat the…
- The Sawset Guide
A sawset is used to carefully and accurately bend the teeth of a saw to develop a kerf wider than the saw plate to avoid it binding as the saw passes into and through the cut. The sawset bends the teeth away from the plate, it is used to bend every other tooth in the…
- Arches- Stop Cut Method
Note: This exercise will help you to remove large amounts of material using the stop cut method. It requires accurate reading of the grain and a sharp chisel. For this exercise, you will need: 1. Cut a template from a piece of paper and transfer the shape onto your wood (Paul uses a more permanent…
- Bench Plane Setup
Note: This exercise will get you familiar with the parts of the plane and where they go. To see the video on putting the plane together, click here. You will need: Bench Plane Bailey-pattern #4 Flat head screwdriver Start by dismantling the plane, take any removable pieces apart, including all the screws but not the…
- How To Make a Strop
For this, you will need: Further Reading To read more on this we recommend the following from Paul’s blog: Making Your Own Strops Restoring Woodworking Gouges Buffing Compound for Chisels and Plane Irons Questions Answered: Strops On Strops and More
- Launching Common Woodworking

The day has finally arrived to launch Common Woodworking! Over the last year we have been working to create content which will guide and encourage beginners to get into woodworking, regardless of their level of skill. Our tool guides provide the basic knowledge which will enable you to start or continue your woodworking journey. Some…
- Angled Cuts
Note: This angled cuts exercise will allow you to practice controlling the saw and the direction of cut. Equipment needed: Wood Pencil Dovetail Template or Sliding Bevel and Square Tenon Saw or Dovetail Saw To view a video showing the sawing technique, click here. Marking out using a dovetail template Use a dovetail template to…
- Sharpening a Router Plane
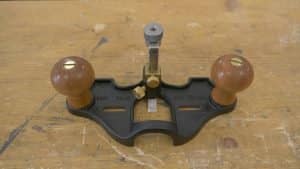
Setting Up Before you use your router plane, it is important to check that the leading edge of the cutting iron, the fore edge, is parallel with the actual sole of the plane as it may need to be corrected, flattened and polished before use (Paul sometimes refers to this process as initialising). This process…
- Sharpening a Card Scraper
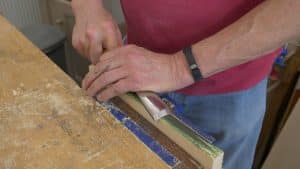
Sharpening Draw file along the 2 long edges by pushing the file away from you, small steel spirals should appear from the edges as a result of the filing. Place each long edge against the diamond sharpening plate keeping it vertically aligned and push and pull it 10 times making your way through all the…
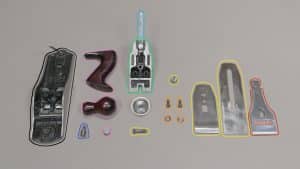
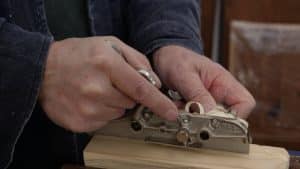
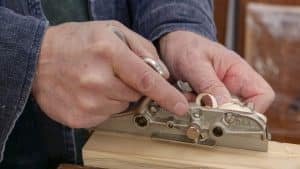
- Sharpening a Plough Plane
Setting Up When buying second hand, the plough plane may be sticky with grease or rusty, this can be cleaned using a wire brush and abrasive paper. Your plough plane may also arrive in multiple parts, start by lubricating the stems with oil to ensure they go into the fence and body easily. Sometimes the…
- Sharpening a Gouge
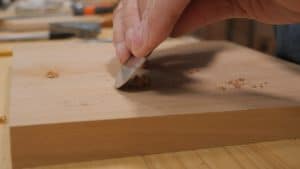
Note: This is the sharpening process of an out-cannel gouge. Paul recommends 2 methods to sharpen an out-cannel gouge which can both be done on diamond plates or abrasive paper. You will also need a curved strop, which you can make yourself, to polish at the end of the sharpening process, for this you will…
- Using a Card Scraper
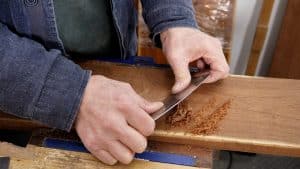
When using a card scraper, wrap three fingers around each side and push your thumbs into the opposite side of the scraper to bend the plate. To begin working the wood, lean the scraper forward and press and push through the base of the scraper plate. The more you bend the card and the more…
- Using a Plough Plane
When using a plough plane, the cutting iron can be set deeper than a smoothing plane as it is narrower and therefore requires much less effort to push into the wood. The cutting iron sometimes go under the wood’s surface fibres and causes them to tear because the side walls at the surface level are…
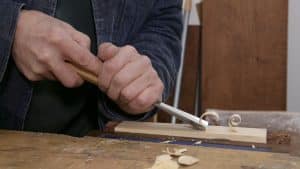
- Using a Gouge
You can drive the gouge into the wood using a chisel hammer or mallet or use hand and arm pressure only. You can use them to pare cut, depending on the gouge type. The gouge can make shallow or deep cuts depending on the pressure applied, if you are using it to hollow, you would…
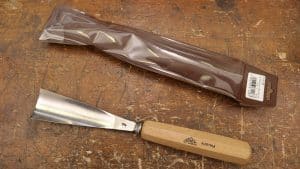
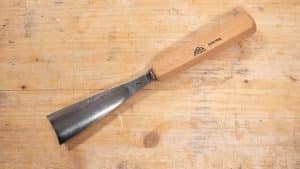
- Buying a Gouge
Paul recommends the Ashley Iles No7 37mm straight gouge to use in spoon and bowl carving. He also uses and recommends Pfeil and Hirsch in similar size and sweep, however these brands are not always in stock. We found the Stubai 40mm No7 to be in stock from Tiranti which is just as good as…
- Buying a Plough Plane
Paul enjoys using a secondhand Record 043 or 044 plough plane, however these are no longer in production as new models but so far they have been readily available via eBay. You can sometimes get a good secondhand deal on eBay for a Stanley 13-030 or similar plough plane and these work very well too,…
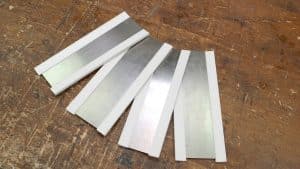
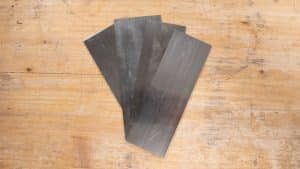
- Buying a Card Scraper
Paul recommends a Veritas scraper as the steel takes a good edge, hardness is just right and not too brittle and they flex well. They come in a set of 4 rectangular scrapers (listed as Veritas Super-Hard Milled Scrapers) which contains scrapers of different thicknesses and sizes so will suit a wider range of options…
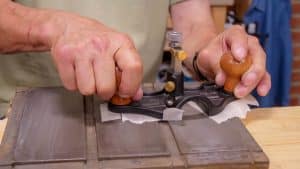
- Setting Up and Sharpening a #80 Scraper
Setting Up Whilst working on a flat surface, turn the adjusters to loosen the retaining bar and load the blade into the holder. The 45 degree angle should be facing the back. Pinch the bar and blade against the body of the holder, making sure the cutting edge stays flush with the sole, and tighten…
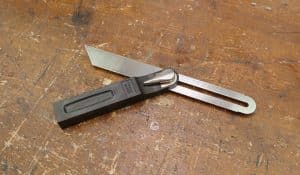
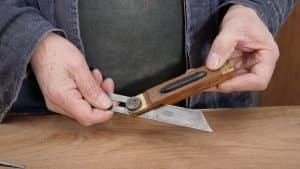
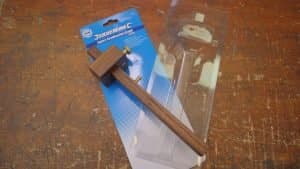
- Setting Up a Sliding Bevel

Setting Up Some sliding bevels have a rounded loop at the end of the beam. Where the straight edges join the rounded edge there is often a pointed edge, which can sometimes get in the way of marking out so Paul recommends filling this down slightly to avoid inaccuracy and misalignment when applying the sliding…
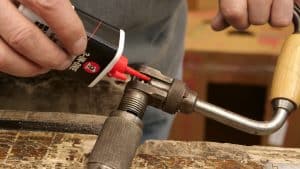
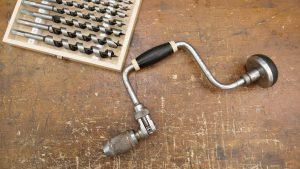
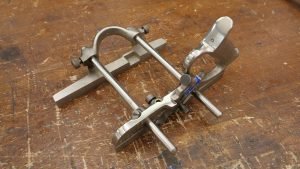
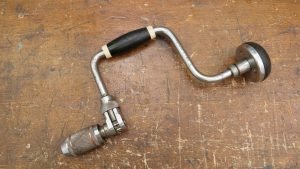
- Setting up and Sharpening a Swing Brace and Bit
If you have purchased your brace secondhand, ensure all the parts move freely without friction, if not you can oil these parts to ease up the friction. There is usually an oil hole where the neck connects to the pad, only one or two drops are needed. The chuck and the chuck thread may also…
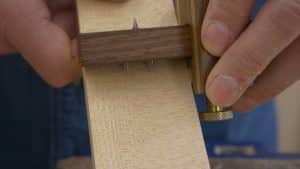
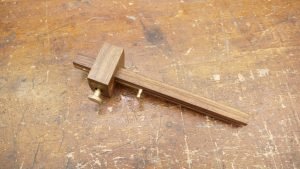
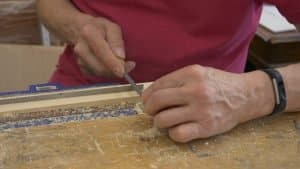
- Setting Up and Sharpening a Combination Gauge
To see a video on centring the gauge, click here. When setting a mortise gauge, one of the twin pins is moveable. Place the chisel against the fixed pin, then set the moveable pin to the width of the chisel. Position the chisel just inside the tips of the pins (refer to picture for positioning)….
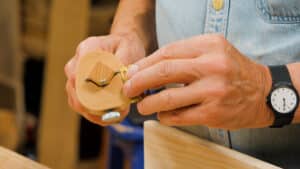
- How To Make a Rounded Card Scraper
This is known as a ‘curved’ or ‘round’ scraper and is mainly used for refining a bowl shape carved into wood. Draw the centre line down a piece of cardstock, draw a rounded, quadrant shape on one half and cut to shape. Fold down the centre line and follow the rounded edge using a knife…
- The Gouge Guide
A gouge is similar to a chisel in the way that it looks as it has a handle and a metal blade, however the blade is rounded which is mainly used for carving. Uses The gouge is used for carving, shaping, hollowing out and curved cuts. They often will be used within fine woodworking for…
- Using a Sliding Bevel
The sliding bevel is used to mark or check any angle. By sliding the beam from inside the stock you can adjust both components to set the desired angle needed. The lock mechanism holds both components in place and can be a variety of mechanism types. These include wing nut, lever cam, slide lock or…
- Using a Router Plane
When using a router plane and removing material to a specific depth, you can use a chisel to remove the bulk of the material then go over it with a router, or you can make incremental depth changes with the router until the final depth is established. Removing the bulk gallery: Though used to level…
- Using a Combination Gauge
To see a video on using the gauge, click here. This can seem like an awkwardly shaped tool, holding the wood with one hand and the stem with the other can aid control. Press lightly but firmly when marking, the pressure should be applied against the registration face, not downwards onto the pins. You don’t…
- Using a Swing Brace
To use a brace, rotate the centre grip and combine hand and arm pressure to push the bit into the wood. The bit has a spiral point that assists to pull the bit into the wood with each rotation you make. The bit is held firmly within the chuck by two jaws. Turning the grip…
- Using a #80 Scraper
When using the #80 scraper, generally known as the cabinet scraper, the first thing you should do is establish a comfortable grip. It is designed so you can hold the handles and press your thumbs into the back of the centre. This applies the most direct force behind the cutting edge. To lower the blade,…
- Buying a #80 Scraper
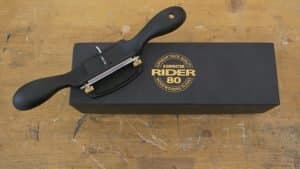
Paul found that although the Faithfull #80 Scraper is similar to the Stanley, the blade was thinner and sharpened to the wrong angle. Although this turned out to be easier to sharpen, it didn’t work as well as a thicker plate. The Axminster Rider No. 80 Scraper comes with an extra thick blade which is…
- Buying a Sliding Bevel
You can certainly make do with only one sliding bevel, but in some larger projects you may be laying out several different angles throughout, and it is beneficial to set a separate sliding bevel to each angle and not alter them for the duration of the project. When buying a sliding bevel, make sure the…
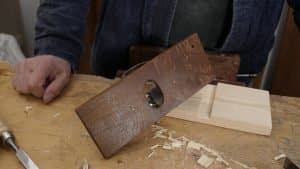
- Buying a Router Plane
Paul would recommend that you make your own router plane. He says “it’s as easy to make as a dovetail box”. The videos and technical drawings are available on Woodworking Masterclasses The metal hardware is available from Rokesmith, our physical products selling platform for £35 (plus VAT and shipping.) We ship worldwide. If you don’t…
- Buying a Combination Gauge
Buying a combination gauge is more cost effective as it essentially combines the marking and mortise gauge into one gauge. Paul recommends the type that have pins rather than discs as the discs tend to be brittle and fracture in places around the circumference. Discs are often difficult to re-sharpen and if broken can be…
- Buying a Brace
A secondhand swing brace should last a lifetime if it has been well looked after. We recommend buying secondhand as there are lots available which are not worn down, they are also much less expensive than buying new. Stanley has proven to be good quality so look out for them when buying secondhand. You can…
- The #80 Scraper Guide
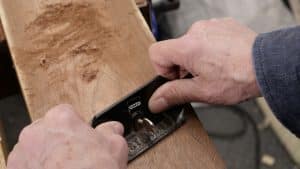
Commonly mistaken for an oversized spokeshave, the #80 scraper slices the wood in a similar way to, but not the same as, a plane. Despite the tool’s name, the scraper does not scrape as such but cuts ultra fine shavings. This double handled tool is used in a push motion to remove very fine sections…
- The Sliding Bevel Guide
The sliding bevel is a layout tool which is essential for accurate and precise woodwork. It is made up of two parts, the beam and the stock which can both move on an axis. These can be fixed using a wingnut to allow you to transfer an accurate angle marking. The stock can be made…
- The Combination Gauge Guide
The combination gauge has 4 main parts, the wooden stem, the wooden stock, the setscrew and the marking pins. The stock has a lock system on it to allow it to keep the distance from the pin, this enables you to mark exactly the right location. The reason this is called a ‘combination gauge’ is…
- General Tool/ Accessories Guide
Eraser This is used alongside the pencil to remove layout lines. Pencil lines are useful to have when constructing the project but the eraser can then be used to remove them once the project has been assembled. Paul likes the Staedtler eraser as it has no rubber in it. 🇬🇧 We purchased this from Amazon…
- The Plough Plane Guide
The plough (plow USA) plane creates channel grooves by removing material from the middle of a piece of wood, leaving two outside edges. The plane has a guide or fence, which runs along the underside or outer edge of the plane body to keep the groove parallel and the plane fully aligned to the material….
- The Card Scraper Guide
The card scraper is a plate of sheet steel which is sharpened along the full length of the long edges and relies on careful precision throughout the sharpening process. The card scraper performs much the same tasks as the #80 scraper (cabinet scraper) and both blade types are made from plate steel, however their blades…
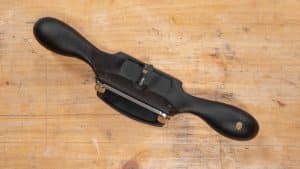
- The Router Plane Guide
The router plane is used to refine cuts which are either made by chisels, saws or machines. In use, the blade cuts in a similar way to a chisel but the blade is fixed within a wooden or metal body and has an adjustment mechanism making this a true plane. Uses A router is used…
- The Swing Brace Guide
A traditional woodworking brace, is used to bore holes from ¼” in diameter and up in increments of 1/16” to 1 ½” which are often too big for a hand drill. They can create cleaner work than power tool versions because they operate by a screw thread and cutting edges instead of power and speed….
- Setting Up and Sharpening a Saw
This applies to all saws except the coping saw which does not need sharpening as it comes with replacement blades, to see how to insert the blades, click here. Note: Some saws will need setting before sharpening and some will need sharpening before setting. This all depends on the quality of the teeth to begin…
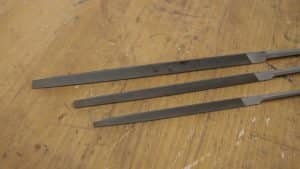
- Saw Files
Saw files can also be known as triangular files or three-square files. They often have single cut teeth across the full width of each facet of the file and can come in many different variations including: Paul finds that 3 main sizes cover most saws: When choosing a saw file, it depends on the type…
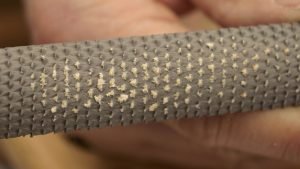
- Setting Up Rasps and Files
A rasp and file cannot generally be sharpened and do not need setting up, however you can prolong their life by taking good care of them. Most of the time the sawdust which builds up in between the teeth will be pushed out by new wood fibres, however you can clear out the gullets by…
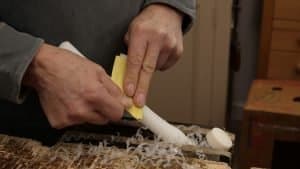
- Setting Up and Sharpening a Spokeshave
Note: Be careful when sharpening as the tools will become very sharp, always face the blade away from you when sharpening. Setting Up If your spokeshave is secondhand, check the angle of the bevelled edge using a protractor. The bevel should be no more than 30°. To set the cutting iron depth, use the two…
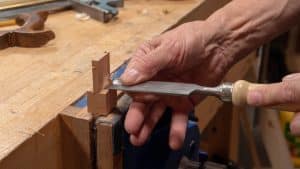
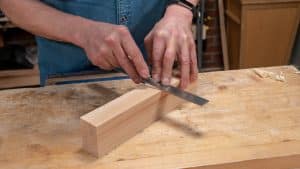
- Setting Up and Sharpening a Chisel
Note: Be careful when sharpening as the tools will become very sharp, always face the blade away from you when sharpening. This guide will show you the process of how to sharpen a chisel using diamond stones and the process of how to sharpen a chisel using abrasive paper. Paul recommends diamond stones, however if…
- Sharpening Tools and Accessories
Note: These methods work best for tools with a cutting edge, to read about saw files, click here. There are several types of abrasive materials you might come across when looking for something to sharpen your edge tools on, these range in price which makes some options more suitable for beginners than others. For abrasive…
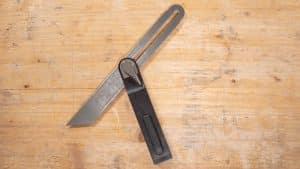
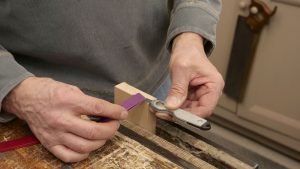
- Setting Up and Sharpening a Woodworker’s Knife
Note: Be careful when sharpening as the tools will become very sharp, always face the blade away from you when sharpening. Often the knifepoint of the blade breaks off quite soon in use, this is because they are used more heavily for woodworking. As they do wear away more quickly than if they were used…
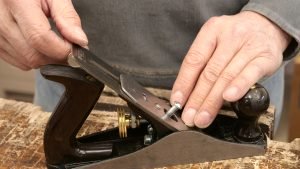
- Setting Up and Sharpening a Plane
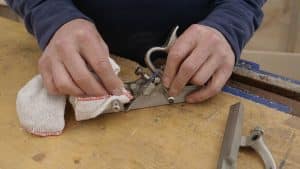
Note: Be careful when sharpening as the tools will become very sharp, always face the blade away from you when sharpening. To jump straight to ‘Sharpening’, click here. Setting up If your plane has plastic handles, you might be able to feel a seam down the middle where the two halves of the handle are…
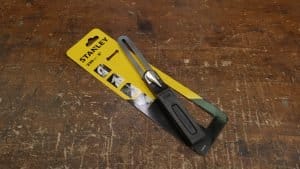
- Setting Up a Hammer
Note: This guide is on both chisel hammers and warrington hammers. Paul recommends scraping off the varnish from the handle when you get a new wooden-handled hammer and he recommends adding 4 coats of boiled linseed oil over a few days. This finish will ensure the hammer handle keeps in great condition and lasts a long…