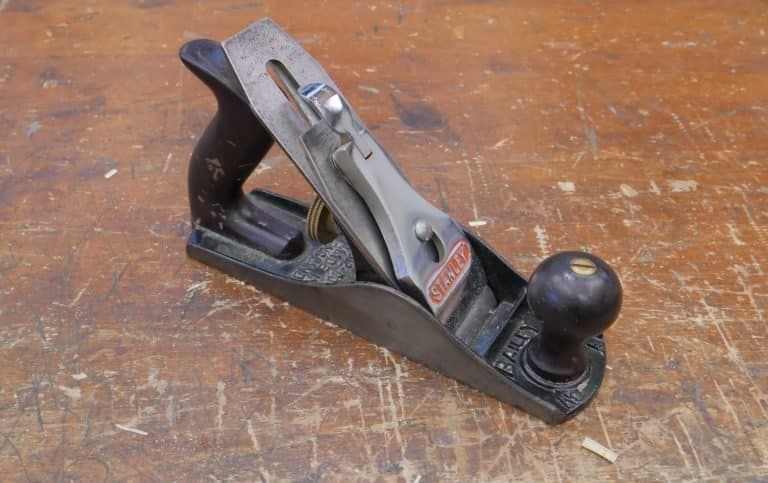
Setting Up and Sharpening a Plane
Note: Be careful when sharpening as the tools will become very sharp, always face the blade away from you when sharpening.
To jump straight to ‘Sharpening’, click here.
Setting up
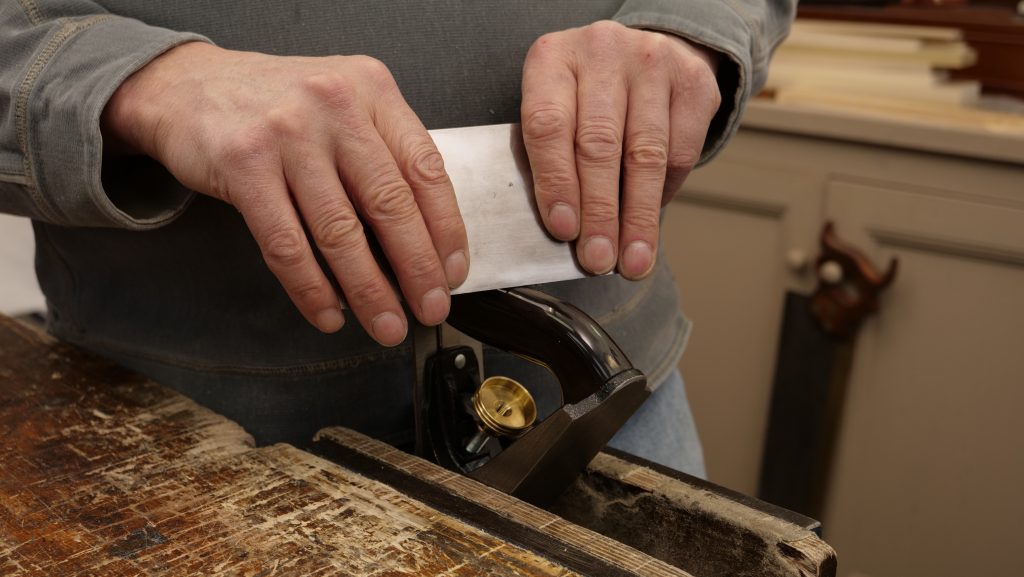
If your plane has plastic handles, you might be able to feel a seam down the middle where the two halves of the handle are joined. If left, these seams will become uncomfortable and might cause blistering. Use a file or a card scraper to remove these, the texture will feel different and will appear less glossy, however you can apply a few coats of shellac if you want the glossiness to return. You can use sandpaper all over the handle if you do not like the feel of the glossy plastic.
Tip: If you have purchased a new plane, you may notice that there is a varnish coating applied all over, this is to reduce the risk of the plane rusting during distribution and storage. This can easily be removed from the sole by using abrasive paper or a suitable solvent.
Check that the sole is flat by holding it up to the light with a straight edge against it, if you can see the light coming through then it means it is not flat. With the sole face down, rub it back and forth on the coarse diamond sharpening plate. Turn the plane over and see which part has been abraded away. Check the sole surface again using the light and the straightedge.


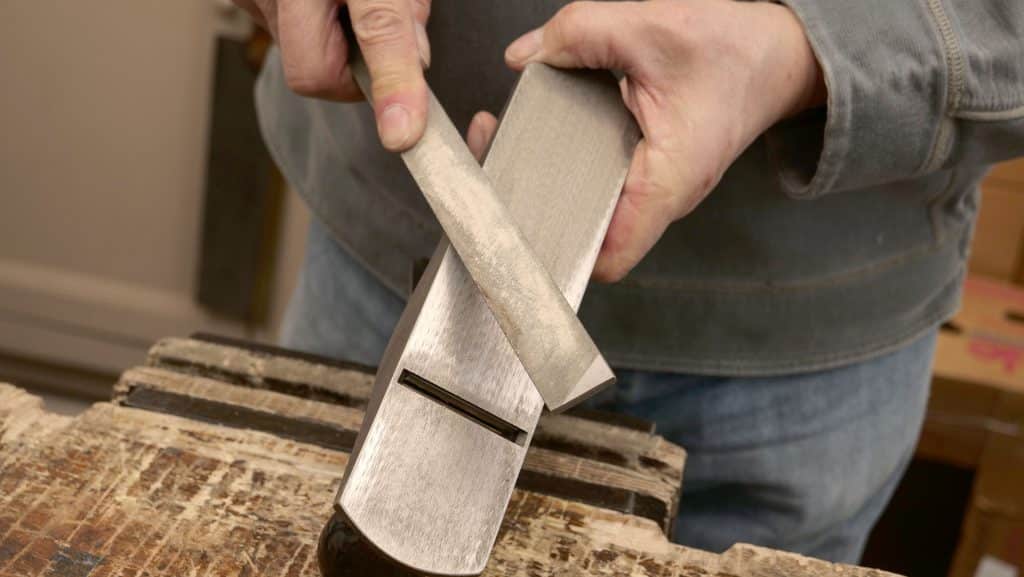
If the edge corners of the sole are sharp, use a file to ease the corners along the length. Change the angle slightly on the second and third strokes either side of the bevel to develop a more rounded corner. Repeat this step to round any sharp corners until you are satisfied with the smoothness. Having a softer edge will minimise the damage if the corners of the plane comes into contact with your project.
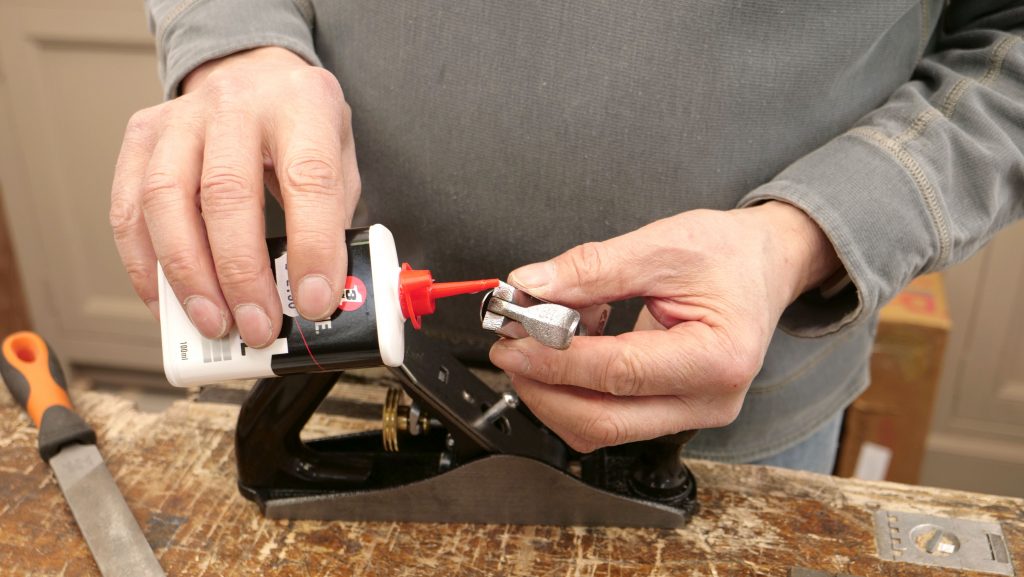
Remove the lever cap. If the lever feels stiff, use light machine oil to lubricate the mechanism. Continuously move the lever back and forth to ensure that the oil is worked into the moving parts.
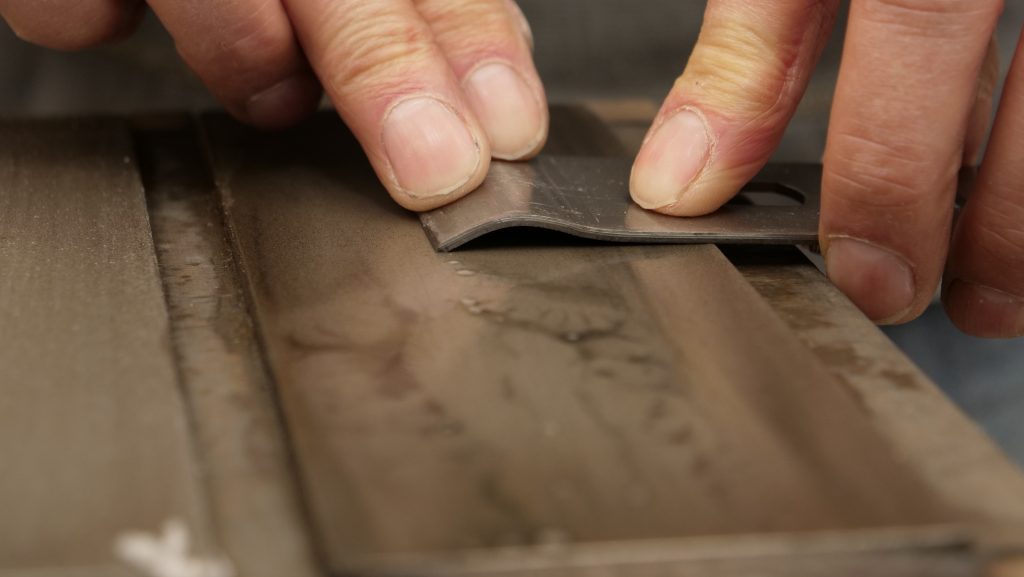
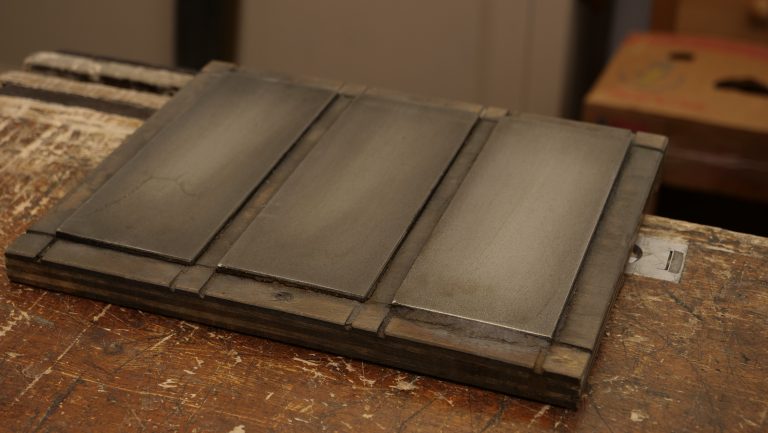
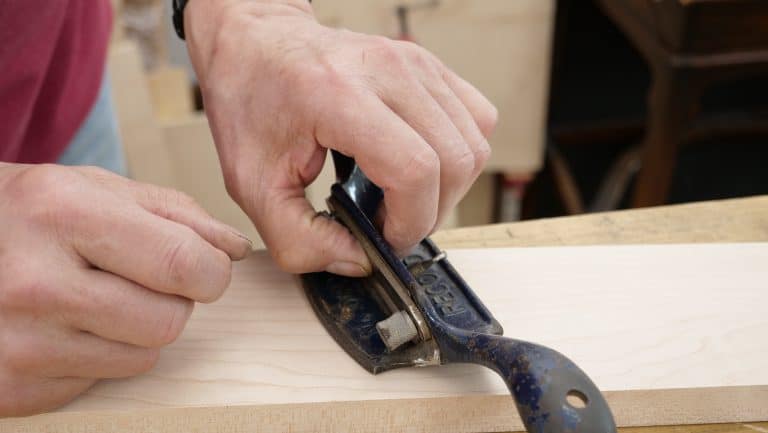
Sometimes the fore-edge of the cap iron needs additional flattening after manufacture. Separate the cap iron from the blade and spray your diamond plates with glass cleaner to float off the waste from the abrading. Place the cap iron on the sharpening plate with the hump as near to the edge as possible, this allows you to develop the under edge at an acceptable angle. If the full length of the cap iron was on the sharpening plate, it would be sharpening at the wrong angle. Rub back and forth to flatten the under edge as shown, you want to make sure cap iron mates to the blade without any gap at all.
Put this back on the blade by crossing them over and swivelling them together. This is for safety as it means the actual cutting edge is never facing towards your opposing hand.
Cap Iron Assembly Gallery:
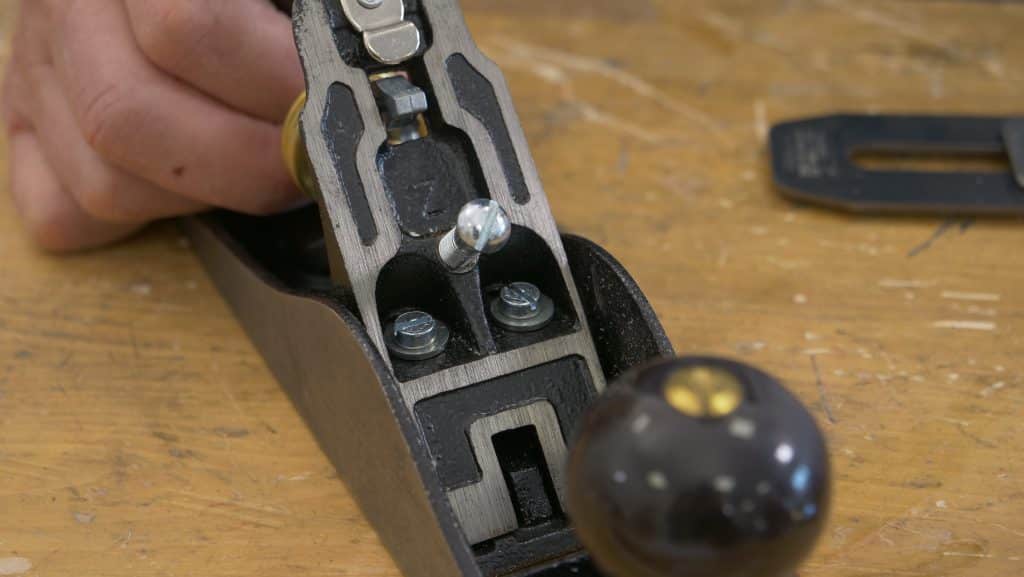
Once you have removed the cap iron and the cutting blade assembly, you will be able to see the inside face of the frog. You can adjust the position of the frog in relation to the sole using the adjustment screw at the back of the frog, this will move the frog back or forward which adjusts the mouth opening.
In order to adjust the frog, the two setscrews in the frog will need to be loosened to finger tight. You can then use a screwdriver to adjust the adjustment screw which will move the frog forwards or backwards, be sure to tighten up the two setscrews when you are happy with the position. You only need to adjust the frog very occasionally, for instance when you have difficult grain. You can get a cleaner cut when the frog is further forward, however this closes up the throat which disallows heavy cuts and thick shavings. For general use you want the ability to change the plane set to include thicker shavings without the throat clogging. The blade lies on the bed (angled rake) of the frog. Adjust the frog until the underside of the blade, the bevelled side, sits in line with the back edge of the mouth opening. You can check this alignment using a straightedge like a steel rule or the edge of a square. When you are happy the angle is lined up, tighten the setscrews fully.
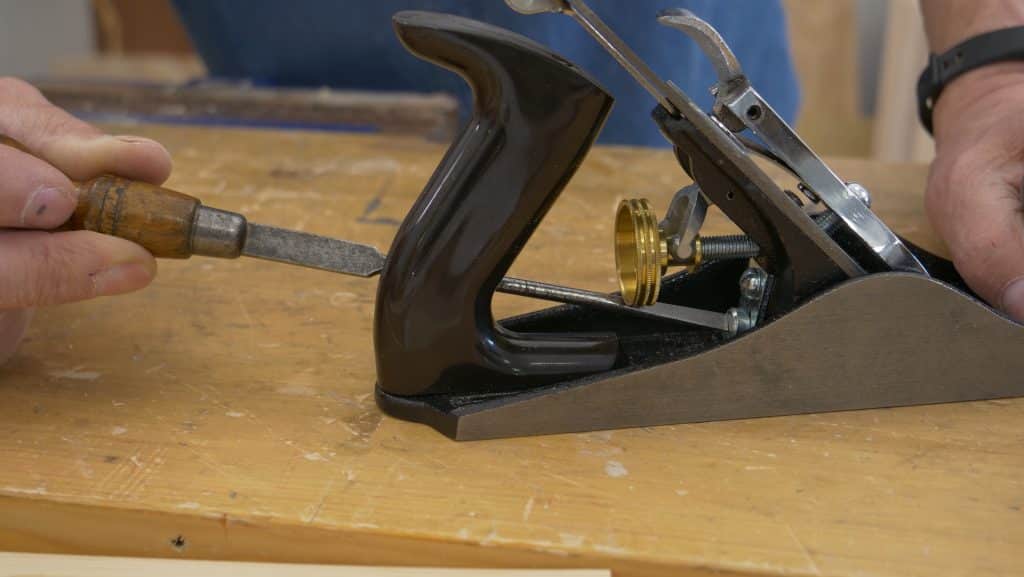

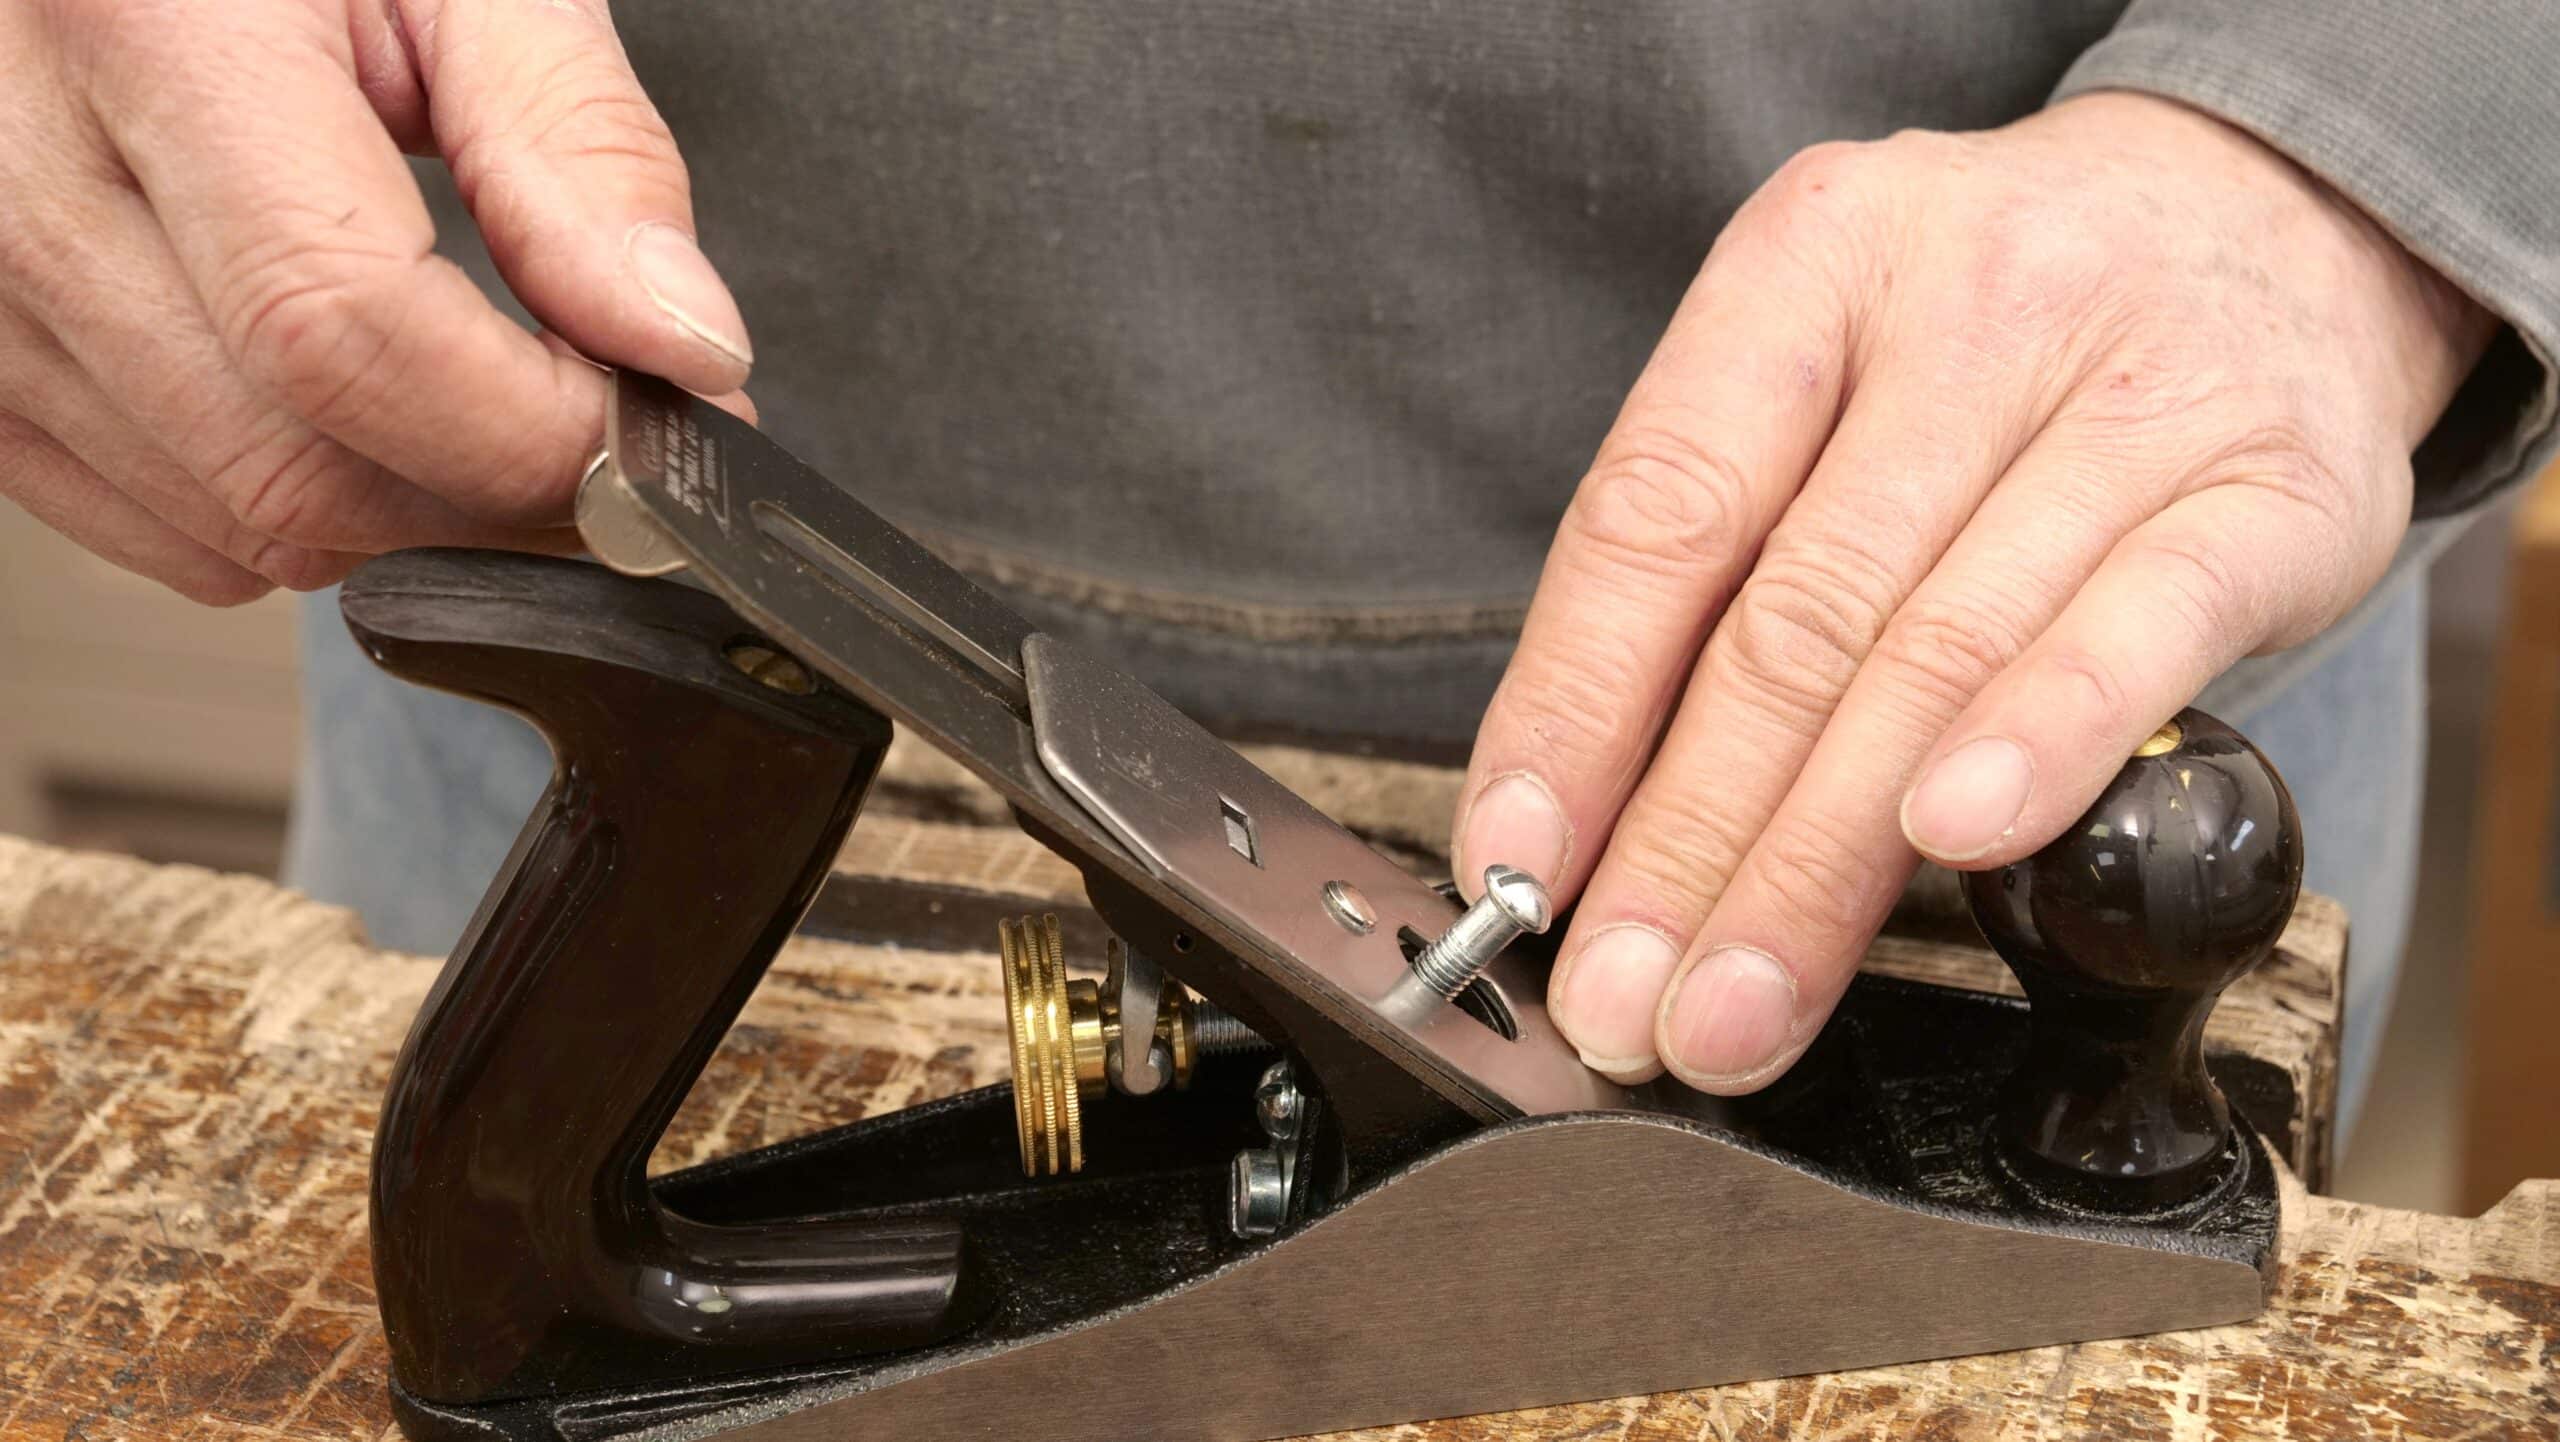
Once you have lined up the cap iron assembly onto the frog, place the lever cap on top and make sure the thumb lever has some resistance. If it is easy to press back, you will need to adjust the cutting iron assembly screw until the lever requires slight force to push back (it should “clunk” into place), turn the screw clockwise to tighten and anticlockwise to loosen.
Once you have set up your plane, it is ready to sharpen.
To see the parts of the plane see the parts section on the plane tool guide.
Sharpening
You can tell when the blade needs sharpening by looking out for one of these indicators:
- It will start skudding
- The grain will start to tear
- The planed wood will feel rough
- The shavings are no longer smooth
To sharpen the cutting iron, you will need:
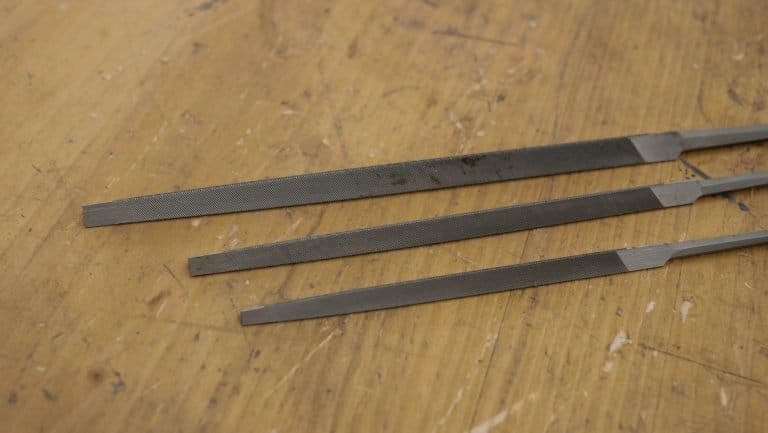
- Diamond sharpening plate with 3 grades (coarse, medium, super fine)
- Glass cleaner
- Buffing compound (aluminum oxide)
- Strop (block of plywood with leather glued on to cover one surface)
The plane blade is sharpened in a similar way to the chisel, to read about this, click here.
Spray auto glass cleaner onto each of your diamond sharpening plates, one pump on each plate is plenty. This is used instead of water as water often starts the rusting process on the sharpening plates. Using the glass cleaner helps ensure they keep in good condition. Place the beveled edge down on the coarse plate. Apply pressure on the end of the cutting iron, push and pull it along the plate several times lengthways. Start with the blade at 30 degrees and end it at 20/25 degrees, this will ensure it has a slight camber to the bevel. This plate generally requires the most work as it will be abrading away the previous dulled edge to form the new cutting edge.
Repeat the previous steps on the fine diamond plate followed by the super fine level. These two levels will continue to refine the abrasions left by the subsequent levels of abrading. A burr will have formed at the cutting edge, carefully pinch the burr with your fingertips and the waste steel will come away in a narrow strip.
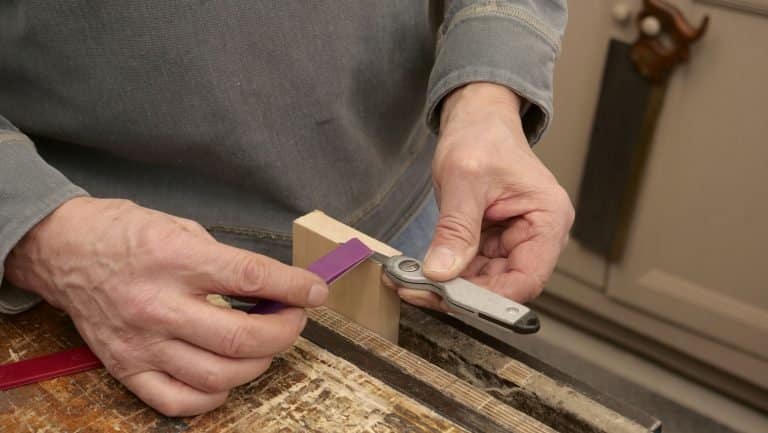
Place the strop in your vise with the leather side facing up. The leather holds the waxed abrasive called buffing compound to the surface so that you can use it to refine the edge using this final level of abrading. Rub the buffing compound on generously to cover the surface of your block. Apply the beveled edge to the strop and pull the bevelled face across the strop 30 times. When stropping, ensure you don’t push the actual cutting edge into the strop because it will cut into the surface of the strop and damage it.
Turn the block over to the plain wood side and add the buffing compound to this wooden surface. This time abrade the flat surface face down onto the buffing compound keeping the blade dead flat. This final step serves to polish out any abrasive marks left in the surface to give the refined finish we need on the back of the blade. Finish off by removing any waxy residue with a soft cloth or tissue.
Put the parts back together and turn the adjustment wheel until the blade touches the wood when you test it on the edge of a scrap piece of wood. Move the plane across the surface to see if shavings appear, if not keep adjusting the wheel until this happens. When shavings are being produced, check to see if they are coming from both sides of the blade, if not, move the lateral adjustment lever until you get the same thickness of shaving from both sides of the mouth of the plane.
Further Reading
To read more on planes, we recommend the following from Paul’s blog:
Sharpening #4 and #4 1/2 Bench Planes
Questions Answered- When is Sharpening Enough or too Much?
How do I remove deep scratches from my new plane sole?
Hi Jeff,
Paul says that wood is extremely abrasive as it grows with silica in the wood. That being the case, there is no need to abrade the sole of a plane beyond 250 grit as it will not result in any improvement in the planes performance.
Kind Regards,
Izzy
Thank you for all that you are doing Izzy and Paul. I am struggling with setting up my handplanes right now. I have purchased a few old Stanleys from eBay, and have tried to replace the blade on the #5 Jack Plane as the blade was quite damaged when I received it. Now that I have a new blade, I believe it is too thick when set on the frog, combined with the original cap iron, to take proper shavings. As I advance the blade I can feel it slow down as it moves forward into the mouth and my shavings are very restricted along with many small chips seem to be clogging the mouth. Would it be wise to file the mouth open some in the jack plane, at the part of mouth just rear of the knob?
Hi Rick,
I asked your question to Paul and his answer is below:
I can only assume you have bought a thick iron because an iron even 1/16th thicker than the standard iron that came with the plane should not cause a problem at all. If you have installed a thick iron, then yes you will have to make adjustments in the plane to accommodate the thickness.
Kind Regards,
Izzy
Hi Guys
Thanks you all of your blogs and video, they are a great help.
I am new to woodworking although I’m not new to using tools as I’ve been a fabricator/welder for many years.
Sharpening blades is my downfall! Plane blade or chisels, they always seem to sharpen out of square! I use a Veritas guide for my chisels but I don’t have the plane blade attachment. I use a cheap single wheel type guide for that set for 25 degrees. How ever careful I am, I always seem to manage to get the blade out of Square and spend hours with 400 grit trying to get it back to square! I’ve even resorted to grinding the blade back to square first before sharpening!
Is it because my guide is not holding the blade square or is it because I have more strength in one arm than the other?
Help!
Regards
Nial
Hi Nial,
Paul says:
This is a self discipline issue and self correction is second by second rather than after several minutes. It is most likely that you are biased in one direction or another which can be a result of having more confidence of whichever hand arm is your dominant one. Try simply pressing on the side that’s weakest and establishing good management technique. It should only take 2 minutes maximum to sharpen a plane iron and spending hours correcting intransigence is unrealistic.
Kind Regards,
Izzy
Hi Izzy/Paul
Thanks for your reply. I have bought a comprehensive selection of used planes. They are all in pretty good condition other than the blades are mostly sharpened at strange angles. I am honing them back to 25 degrees following Paul’s instructional videos, hence the more sharpening than usual.
Another problem I am finding is that although I am now getting the cutting edge perpendicular to the iron I seem to have to adjust the blade adjustment lever quite a lot to the left or right to straighten the blade to the blade opening.
I have flattened the sole plate using 240 grit fixed to glass on the bench. I turn the plane around periodically while flattening to negate the possibilty of grinding more on one side. I use a sharpie to mark the sole plate so I can monitor the flattening.
What is the most likely cause of the adjustment level issue and should I be worried if the plane is cutting correctly?
Sorry, a long one but probably a simple problem.
Thanks in anticipation.
Nial
Hi Nial,
Paul says:
No, you shouldn’t be worried at all, it shouldn’t matter if the lever is way off centre. Many people think the lever will be in the middle if the iron is correctly sharpened. That’s not the case at all. Don’t worry about it, just plane.
Kind Regards,
Izzy
Hi Izzy and Paul,
I just acquired a closed handle coffin smoother made by Auburn Tool Co. of NY. My question is about the cap iron/chip breaker. It’s very thick and doesn’t have a curve/bump like a Stanley chip breaker. What angle should I sharpen it to and do I put a camber on it?
Hi Raymond,
Thank you for your message.
Paul says:
I would make an educated guess and try it. No need to reinvent the mouse trap, don’t fix what ain’t broke.
Kind Regards,
Izzy
Hi Izzy/Paul,
Is there a way to assess if a plane iron is as sharp as it should be?
I’ve never sharpened or used a plane before and the force required to generate a fine shaving of pine seems to be excessive. This would be simple to figure out if I could physically handle a properly sharpened iron/plane.
The plane is a Stanley 4 from the early 1930’s that I have restored using the instructions and videos found here. I’ve initialized the iron to 25 degrees (via honing guide) and sharpened by hand using the methods outlined here (EZE LAP/strop) between ~25-30 degrees. A burr is formed during sharpening.
If I drag my finger perpendicular accross the sharpened iron’s edge it feels sharp but not kitchen knife or razor blade sharp. It will cut paper but leaves a jagged cut. it will not trim arm hair. Is this sharp enough?
I’ve re-sharpened a few times trying to improve the edge but I get the same result. Maybe it requires more force to plane than I thought?
Thanks for the information. This resource has given me hope for learning proper woodworking techniques without having to spend a lot.
-J
Hi Jonathan,
Paul says:
There is no practical way of testing a plane for sharpness as in the scientific ways for us mere mortals. So we rely on how the plane responds on the wood, does the wood grain tear? Do we feel lots of resistance? Things like that, that’s a good a test as any.
I think you probably expect too much of yourself in these initial throes of sharpening. Please, just use the plane on whatever you’re working on, then sharpen up periodically. Ultimately it will come and you will not get caught up so much in the minutiae that is now so predominant and unnecessary in our world of woodworking.
Kind Regards,
Izzy
Hi Izzy and Paul!
I was rewatching the “Restoring the Bench Plane” and it got me thinking. Should I file the corners of the sole even on a new plane?
I’ve been getting these marks in the wood since I started using my new plane. My guess is that it has to do with the sharp cornes. Maybe my question therefore answers itself? 🙂
Regards,
Henric
Hi Henric,
Thank you for your question.
Paul says:
Yes, you do, exactly the same as we did in the video even for new planes.
Kind Regards,
Izzy
Hi Izzy and Paul
I´ve got a #4 Stanley which blade is quite sharp.
I use the plane, the shavings are long and smooth until suddenly it stops cutting
A quick inspection reveals clogging between the cap iron and the cutting one. Dismantle the plane, clean the clogging and up we go, it cuts again… for a short time until again clogging is found in the same place.
I assumed the cap iron might be loose, so I fastened it (heavily I would say) with no improvement.
There are always shavings between the cap and the cutting irons.
What can I do?
Thank you in advance.
Best regards
Carlos
Hi Carlos,
Paul says:
Two things could be happening here, one is, you have not checked to see that there is no opening at the leading edge of the cap iron between the cap iron and the back of the blade. Two, sometimes applying pressure via the set screw in the middle of the cap iron causes the fore edge of the cap iron to open up but in such a minute degree that it cannot be seen with the naked eye.
Kind Regards,
Izzy
Hey Izzy/Paul,
I’m having a lot of problems with getting rid of the burr. I have a double sided EZLAP diamond stone with 250 on one side and 600 on the other. I can get a burr fairly easily, but when I go to break break it off buy pulling the steel flat side down on the stone the burr doesn’t break off it just bends up the other way. So now i have a burr on the bevel side. And eventually it end up with pretty dull edge trying to get it off. Any Advice?
Thanks!
Hi Josh,
Paul says:
That is what the strop does, pulling the bevel against the strop several times with or without buffing compound will remove the wire edge. If it doesn’t remove it for some reason, simply using the plane will take the burr off.
Kind Regards,
Izzy
Hi Paul,
I have an issue when using the plane perhaps you could help me with.
I am using a number 4, with a sharp blade, also I have taken the corners off the edge when sharpening as you suggested in your videos on sharpening a hand plane iron.
I find when planing a wide surface I leave a furrow in the wood, the width of the plane iron. I think this is because I am taking too deep a deep cut, but when I move back the iron it will not cut or cut very slightly. I might have something in the setup wrong, because when looking down the soul of the plane I can see the iron protruding a bit.
I am thinking the frog position is off, I have it positioned close to the edge, so that the iron is resting on it as it protrudes through the mouth opening. I am hesitant to move it back as the iron will not be supported properly when closing the lever cap.
Regards
Godwin
Godwin,
I had a similar problem. I found with my number 5 I was having to take a deep cut to get any result and the plane would just skip over any knots in the wood. This was a major problem as the boards (laminated reclaimed pine) I am planning have at least 12-15 knots in them. After some investigation and research I decided to regrind my cutting iron. I ground it back to a 25 degree bevel and carefully honed the edge and now the plane works beautifully. I can keep it at a very shallow setting and it goes through everything like butter. Looking back at it now, I am pretty sure I had honed the bevel closer to a 45 degree angle.
I hope this helps.
Cheers,
Tyler
Hi Godwin,
Paul says:
I think what you need to do is learn about the adjustment more by planing wood. I think the more you plane and the more you examine, the more you’ll understand the plane. Remember you very rarely take a full width cut.
Kind Regards,
Izzy
Hi Izzy and Paul.
Thanks for all the great content, it´s really helpfull for a novice like me. Quick questions though, can i use abrasive paper for sharpening a plane iron in the same way as for sharpening chissels?
Regards,
Jan-Magnus
Hi Jan,
Yes you can but Paul only recommends using sandpaper as a short term solution as it can be costly.
Kind Regards,
Izzy
Might be due to the absence of a relief angle at the very cutting edge.
Then the plane skid on the wood.
Hi Paul, Izzy
I have a faithfull no4, issue is I can’t retract the blade enough, it protrudes even when the adjuster is fully in. I feel the slot in the blade is to low or the part the blade sits on isn’t high enough. A quick google search shows I’m not the only one with this issue on this particular plane.
Any advice is greatly appreciated.
Hi John,
Paul says:
It could be that the slot is in the wrong place. Without seeing and holding the plane I can’t determine this. It could be that the distance between the cap iron and the cutting edge is incorrect, it should be anywhere between 1/32” and 1/16”.
Kind Regards,
Izzy
Hi Paul,
My plane is sharp as a razor, but even when I assemble it, with the blade fully down, it takes no cuts at all. Why should I do?
Hi Lucas,
Paul says:
There are several reasons that could occur for this. I don’t know your level of skill in using the plane and setting it up so it’s hard to answer your question. If, as you say you have sharpened it correctly and paired it to the cap iron with a distance of 1/32 – 1/16”, bevel down then there should be no reason for it not to work. Especially would this be so if the plane was working before you had sharpened.
Kind Regards,
Izzy
Hi Izzy and Paul, I have a #5 and the lateral adjustment is very loose so it won’t hold straight. Can I fix that somehow? Thanks so much ☺️
I asked Paul and his reply was:
The lateral flow adjustment does not need to be in a rigid position after you have made your adjustment it can waggle around and the setting will not change.
Hi Paul and team,
I recently acquired a new to me no 5 plane (Rapier 500). I have a strange issue wherein the blade seems to advance into the plane body even when the frog is fully adjusted rearward. The issue appears to somewhat be rectified if I increase the distance between the cap iron and the edge of the blade to approx 1/4″. That distance is obviously too far, but it still leaves an awfully small throat for shavings to pass through. Any thoughts as to what the issue may be? I suspect someone may have over “trued” the cap iron, but don’t know how best to further troubleshoot the issue.
Thank you!
Andrew
I asked Paul and his answer was:
It may be that the throat casting was just too small and you need to compensate by filing the forepart of the sole by a mm or so.
Thank you Katrina and Paul!
I was wondering if that could perhaps be a possible solution. I ended up taking a closer look at the plane, and in my troubleshooting decided to give the blade a fresh edge. In the end the edge was quite out of square. After a few minutes work I had a fresh (and a much closer to square) edge. The throat is still quite small, so I may take a file to it someday, but for now I can take a shaving!