Gluing Up a Table Top (and Other Wide Boards)
Ensure all your boards have been trued and are square, to see how to do this, see our Truing Stock guide.
For this you will need:
Lay the boards flat on a large surface such as the workbench top to decide their configuration. Then, put your boards together and align the edges on two pencils. Pinch both your boards together and place them carefully in the vise. Use a plane to take off the high spots and get them so that they are the same level.
Once you are happy your boards are straight and true with no gaps, zig zag the glue along the edge of one of the boards then use the second board to even out the glue over both surfaces.
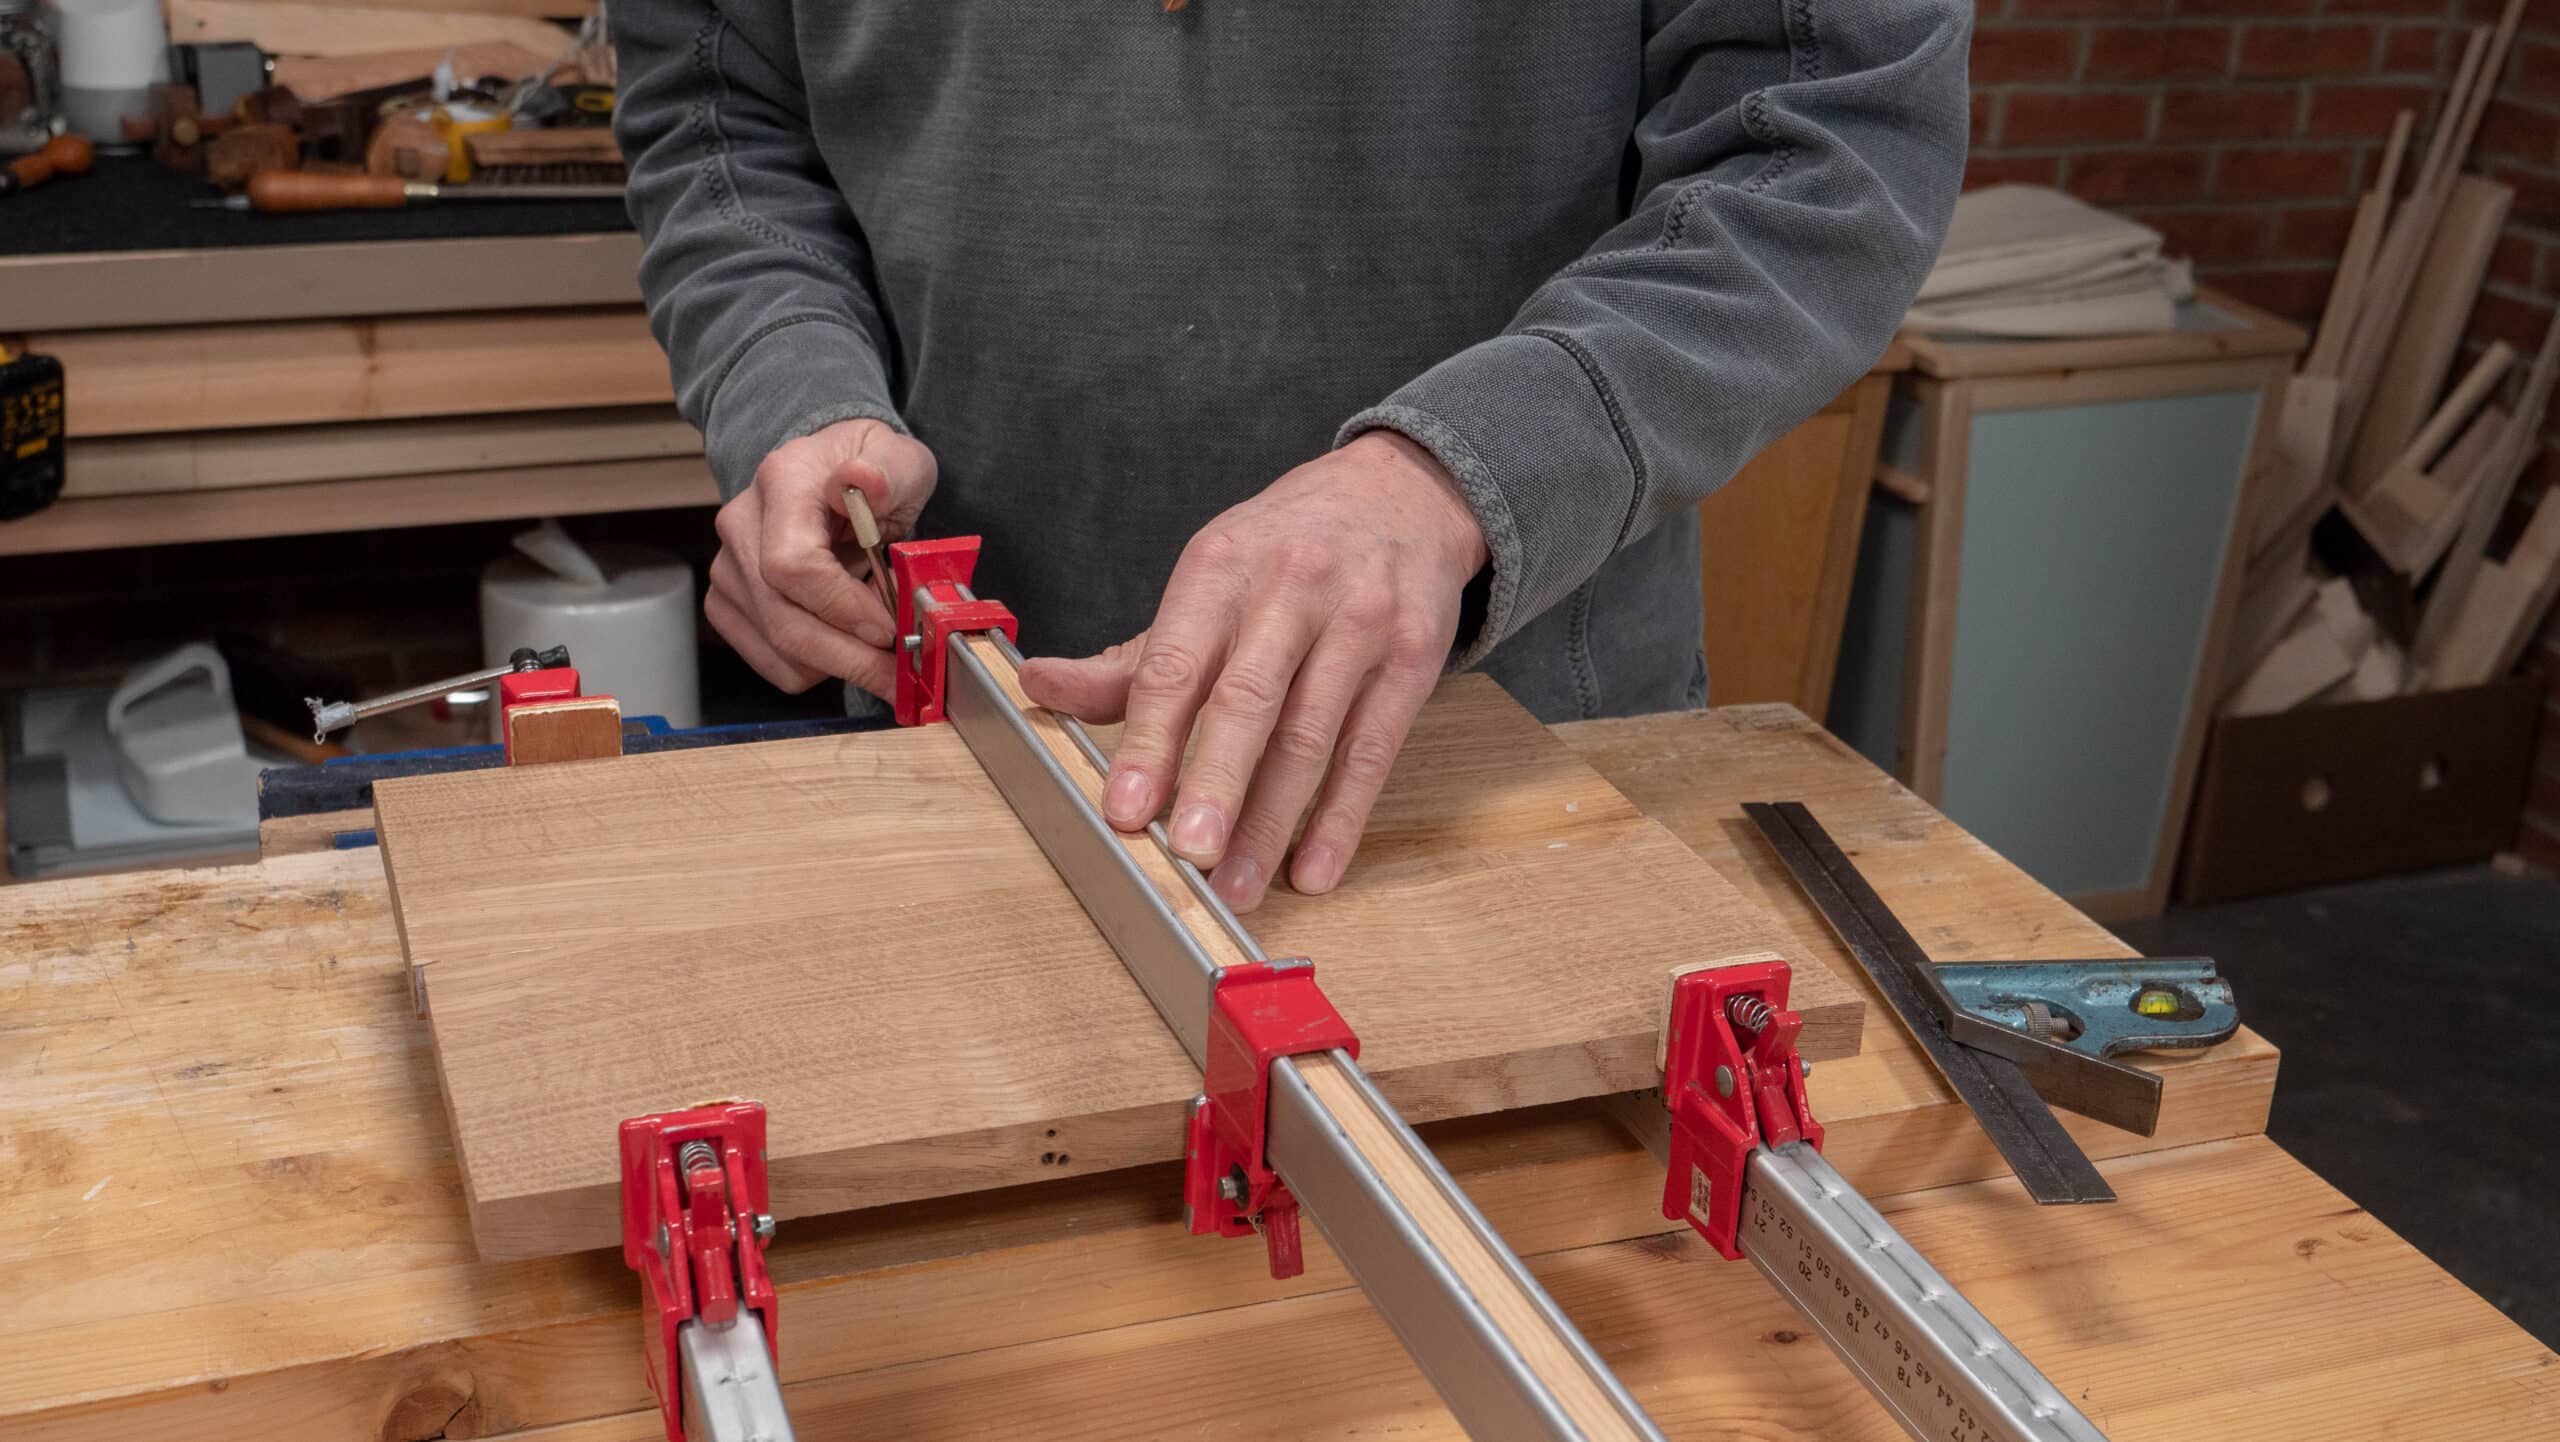
Use two clamps to hold both glued surfaces together. Put a third clamp on top of the boards to prevent uneven pressure that will often cause a bowing up. This then helps to squeeze out any excess glue. Wipe away any excess glue with a tissue. Keep in the clamps for approximately 8 hours so that the glue has time to dry.
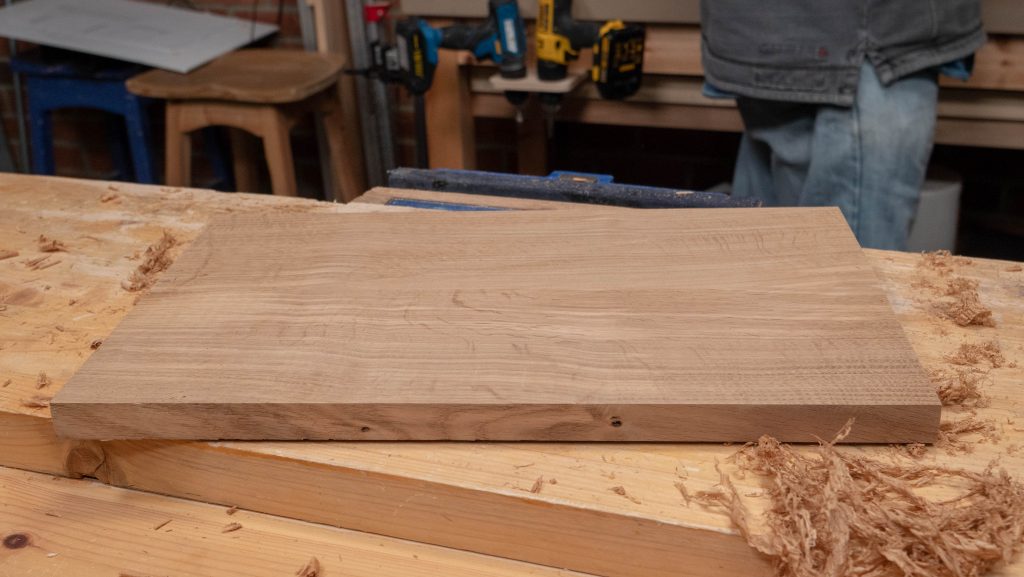
Once dry, cut to the size you need. Plane the newly sawn edges. When planing the end grain, be sure to avoid the ends splitting by planing in halfway then coming from the other side.
Place the clamp in the vise and use it to hold the board while you scrape the surface. Use a #80 scraper to even up the surface and remove the glue. Finish off with sandpaper.
What if you need to glue up more than 2 boards? I can see that the technique works for boards of equal width, but what if the widths differ and you want to use them with varying widths? How would one proceed to get the edges to be glued even?
Thank you, once again, for all you and your team do for us!
@BobHutchins- Just pinch the boards together as shown and use the edges that are lined up on the pencils as your jointing edges. This will work even if the boards are of unequal width or are tapered. If you are gluing up 3 or more boards you have to joint each pair of joined boards separately. You would joint the first pair, say board 1 and the middle board, then use the other edge of the middle board and board 3 as your second joint. Make sure to first lay out your boards in the order you want them and then mark across each joint with a unique mark to keep the joints in order ( I use a pencilled slash mark on the first joint, 2 slash marks on the second joint, etc. This also helps with keeping the up side up). Hope this helps.
Hi Bob,
Paul says:
This system works for multiple board glue ups, you simply bring those edges together in pairs in the same way as a two board glue up, making sure that each corresponding edge is marked in some way to identify them.
Kind Regards,
Izzy
I have a wide board that is cupped so badly as to be unusable. I plan on tipping it in half, flattening each half and jointing the edges to glue it back together. My question is, should I reverse the orientation? In other words, have the bark side of the boards facing in opposite directions?
Hi Ken,
Paul says: no, now that it’s moved, if it’s stabilised you should be able to rip it, resurface it and reglue it without further movement.
Kind Regards,
Izzy
Im having issues with my glue. Its original titebond. It comes out like a runny pudding, i noticed yours is very smooth and flows freely. Is that an indication of bad or old glue?
Hi Stanley,
Paul says:
Usually, it is old stock even though you may have recently bought it. I have had it where it would not come out of the jug, the best thing is to return it as it definitely needs to be the right consistency of liquidity.
Kind Regards,
Izzy
What is your approach to the orientation of the boards? Do you alternate them bark side up bark side down, or does it not matter?
Hi Stephen,
Paul says:
I have never practiced this approach but it is an industry standard. As long as the wood is dried down to between 8-10%, you will have no problem with the wood.
Kind Regards,
Izzy
Hi Izzy,
I glued up three boards together (spruce or fir) and was truing it up. I managed to flatten my registration face, square my face edge, cut the board to required width and square the adjacent edge. I marked the thickness I want the board to be and started to plane the last face, but during planing I registered something odd. At the edges, I was closer to the thickness mark than at the middle on the end grain faces.
When I checked, I found out the board it bent and my registration face is not flat anymore.
Has this ever happened to you or Paul? Is there any possible explanation for this?
Thanks and Merry Christmas!
Miro
Hi Miro,
Thank you for your questions, Paul says:
Yes, often boards will move in a very short space of time and they must usually be constrained in some way either with turn buttons if it’s a table top or held within grooves if it’s a panel.
Kind Regards,
Izzy
Hi Paul,
Very informative as I prepare to prep and glue up some quarter sawn oak for a set of mission style bookcases. One technique I’ve been reading about recently when doing glue-ups is to create a spring joint by planing the slightest of concave edges on the glue up faces. The intent being that when the concavity is clamped it will draw the faces along their full lengths tight. Are you familiar with this technique? Do you have any feelings about its use one way of the other?
Carl S.
Hi Carl,
I passed on your question to Paul and his answer is below:
I do have feelings on it, and i’ve never really liked it. If I have clamps enough, I would just edge joint the edges and then glue up and clamp. My experience of spring clamped joints is that they tend to put too much pressure and tension along the joined edges.
Kind Regards,
Izzy
Hi Izzy,
I would like to do this exercise but using 3 pieces of wood. For more stability (in order to avoid the board to move with time) I guess I could glue the middle piece with the grain in opposition to the other 2 pieces of wood, but if I want to plane the board once it is glued then the middle piece (with the grain in the different direction) could be a problem with the plane. What is better? In this case is it worth it gluing one piece with the grain in an other direction or should I glue the 3 pieces with the grain in the same way?
Regards
Etienne
Hi Etinenne,
Paul says:
It’s no good to glue opposing grain in the way you suggest because the wood along the long axis will always swell more than in the length. Ultimately this will result in the parts splitting or separating.
Kind Regards,
Izzy
Hi Izzy ,
Do you suggest thicknessing of Boards before , or after glue-up ? Thank you
Hi Peter,
Paul says:
I think it’s good to take down all rough surfaces ahead of time because these faces are reference faces for checking twist and warpage. The final thicknessing of course will come after glue up when you’re levelling adjacent surfaces that may be slightly uneven. Of course, I don’t know if you’re talking about thicknessing by hand or by machine. If you are using machine then you can simply pass the board through the machine then this is done for you.
Kind Regards,
Izzy