Setting Up and Sharpening a Chisel
Note: Be careful when sharpening as the tools will become very sharp, always face the blade away from you when sharpening.
This guide will show you the process of how to sharpen a chisel using diamond stones and the process of how to sharpen a chisel using abrasive paper. Paul recommends diamond stones, however if you are just starting out, use abrasive paper as a short term substitute until you decide to invest in the diamond stones.
Diamond Stones
To set up and sharpen your chisel using diamond stones, you will need:
- Diamond sharpening plates with three grades (coarse, fine, super-fine) or an alternative (click here to read more about sharpening equipment)
- Auto glass cleaner
- Buffing compound
- Strop (block of plywood ¾” (19mm) thick by 3” (76mm) by 10” (254mm) long with leather glued on to cover one surface)
Setting Up
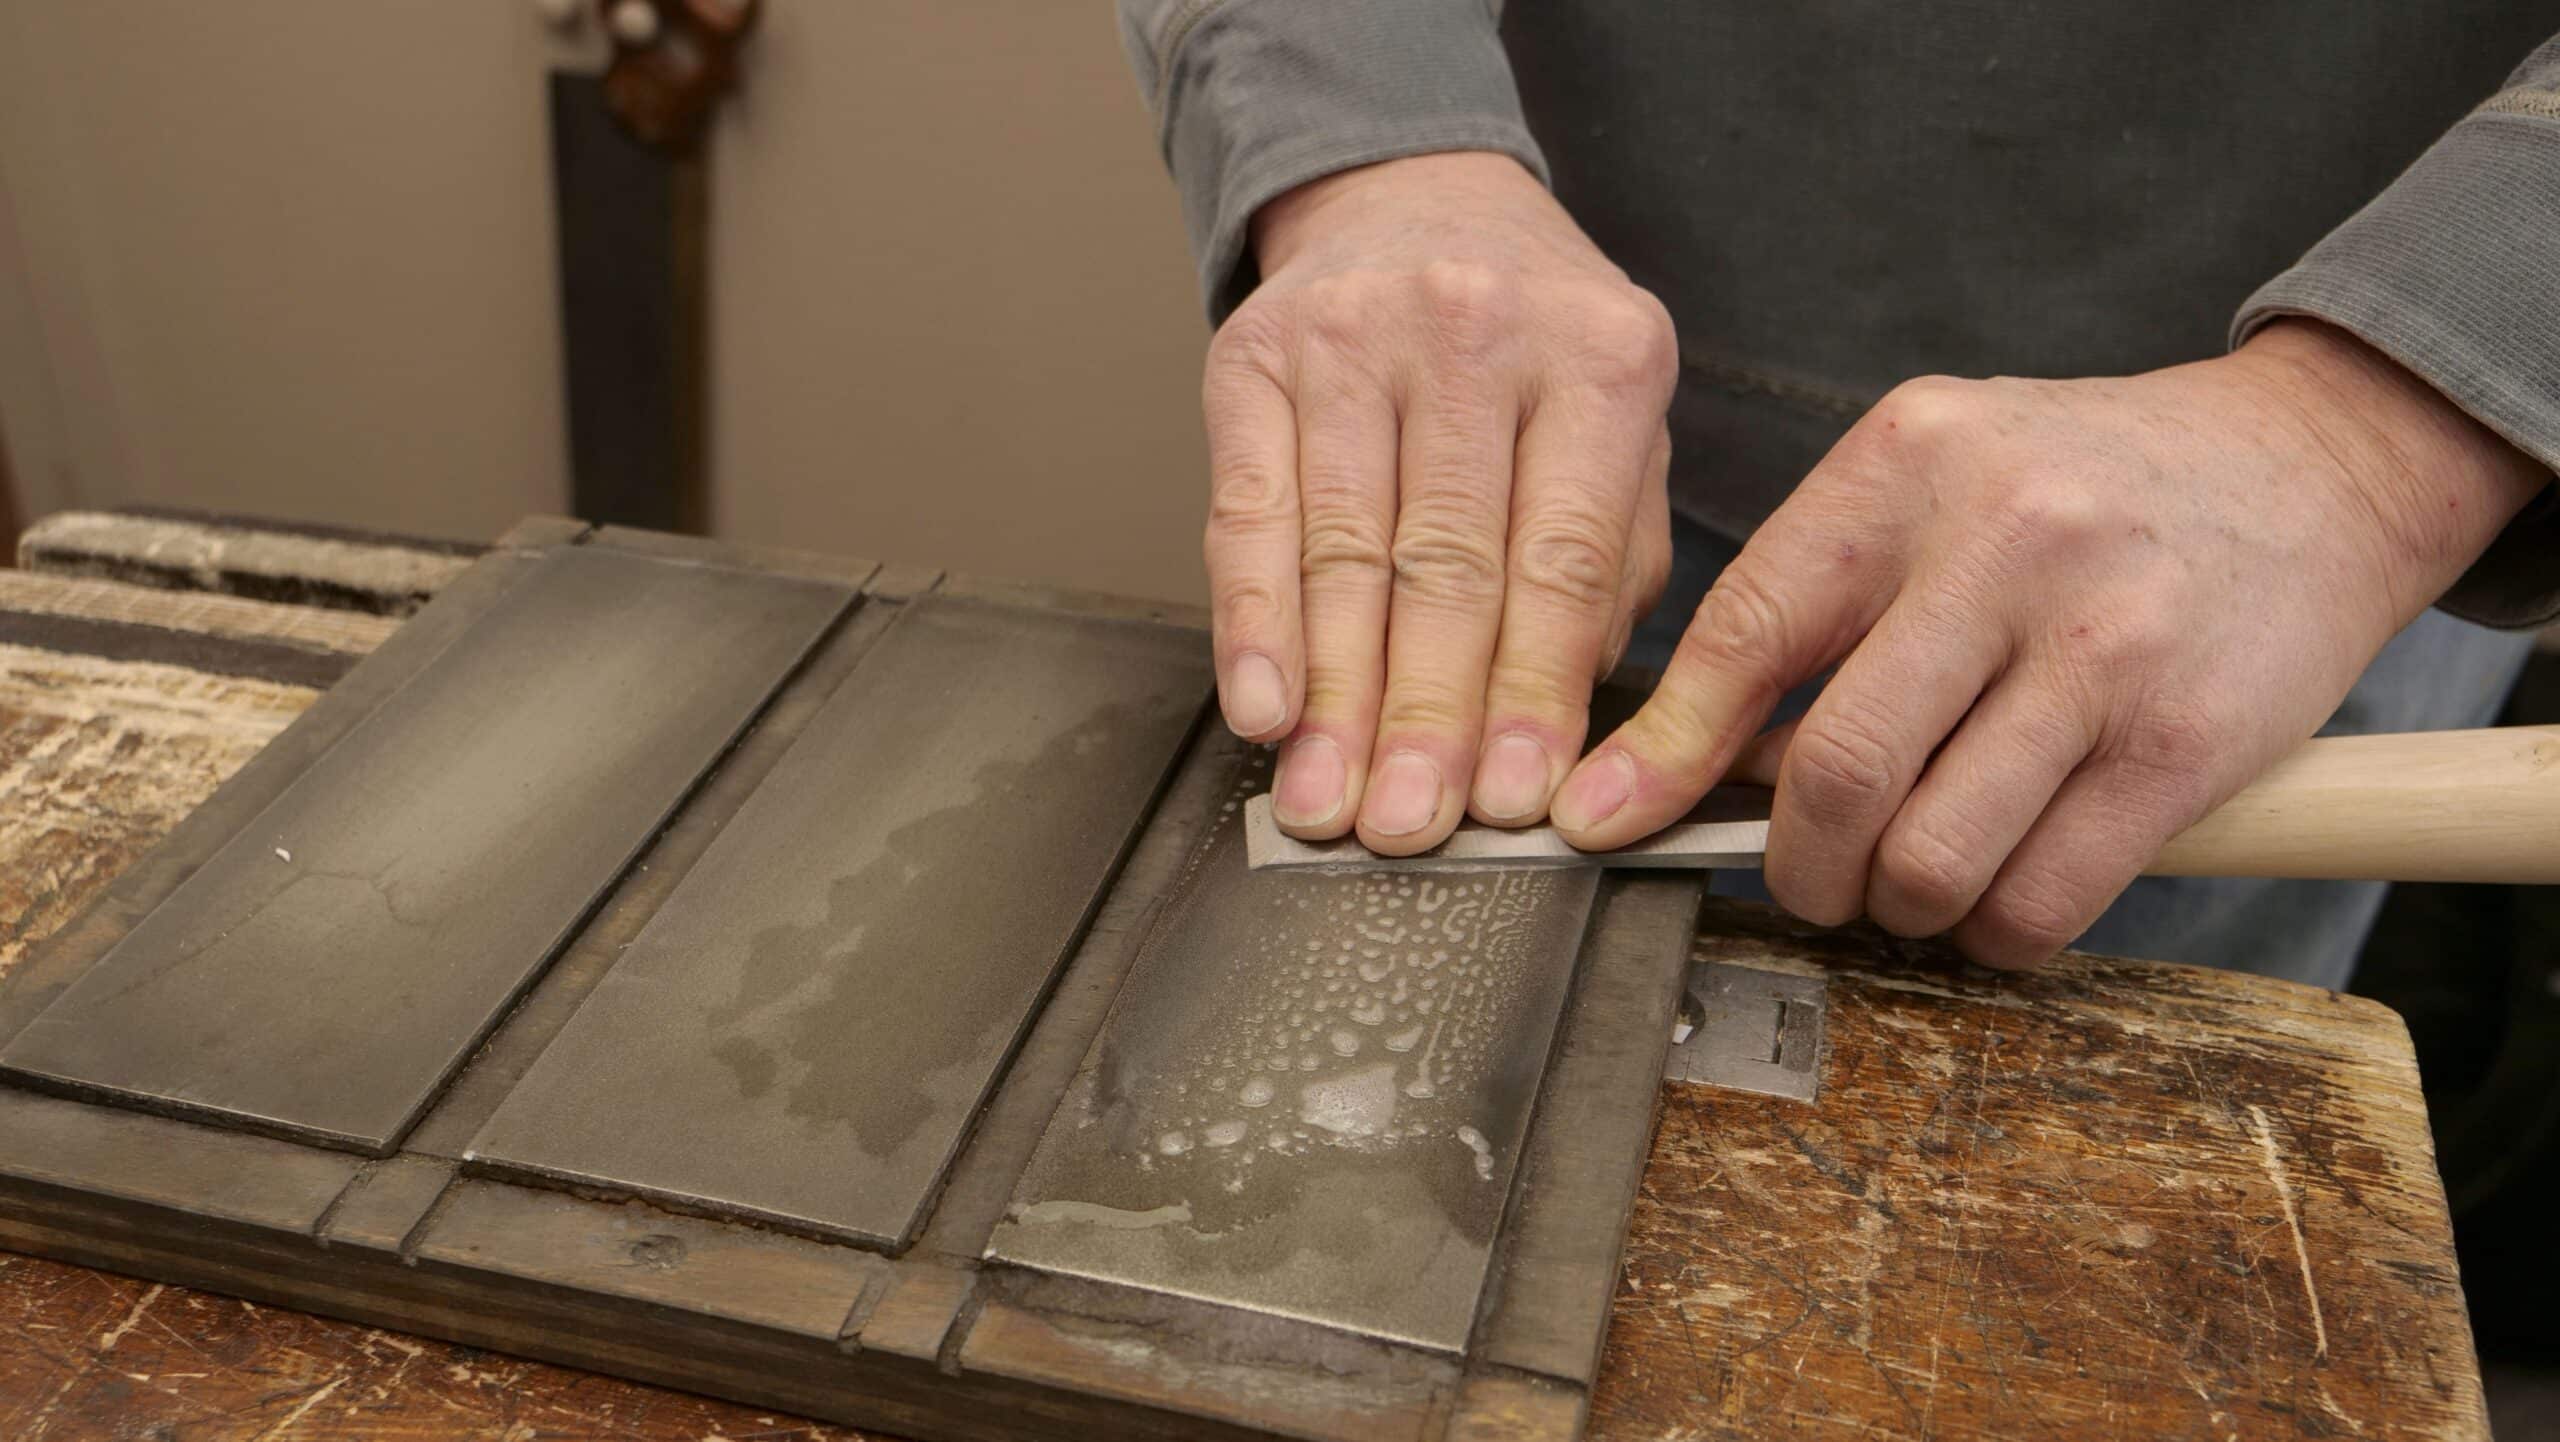
Whether you have purchased your chisels new or second-hand, it is important to check the flatness of the large flat face and flatten and polish as necessary (Paul sometimes refers to this process as ‘initialising’). You need to ensure the surface you are sharpening your chisels on is truly flat as any distortion will reflect in the surface you are abrading, if you have good quality diamond plates, you can usually guarantee these are flat. Start with the coarse plate and rub back and forth, pressing down on the bolster with one hand and using the other hand to press the blade down flat.
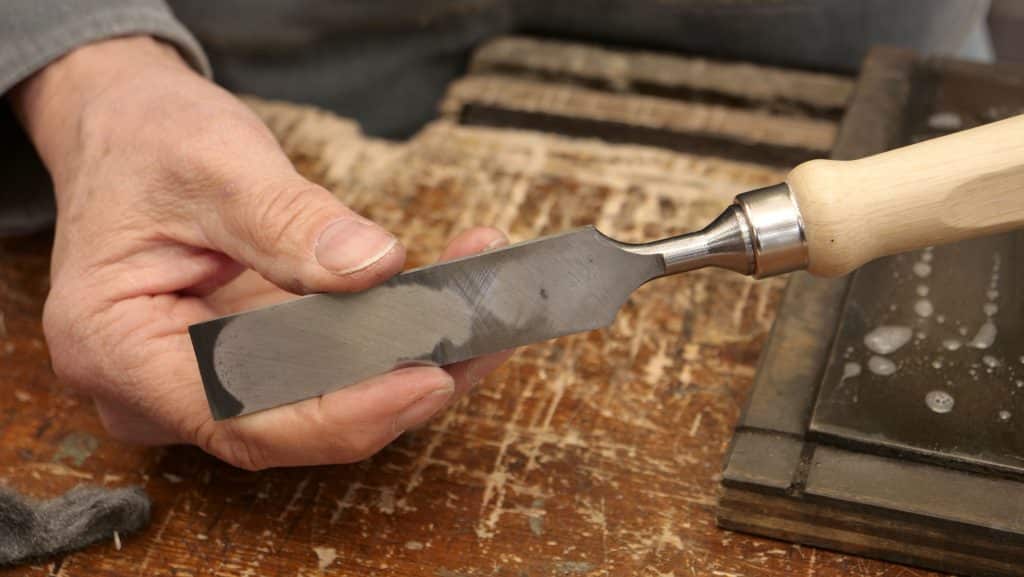
After a few strokes you can turn the chisel over and see what has been removed. If you can see that some material has been abraded in patches it proves the chisel had not been flattened.
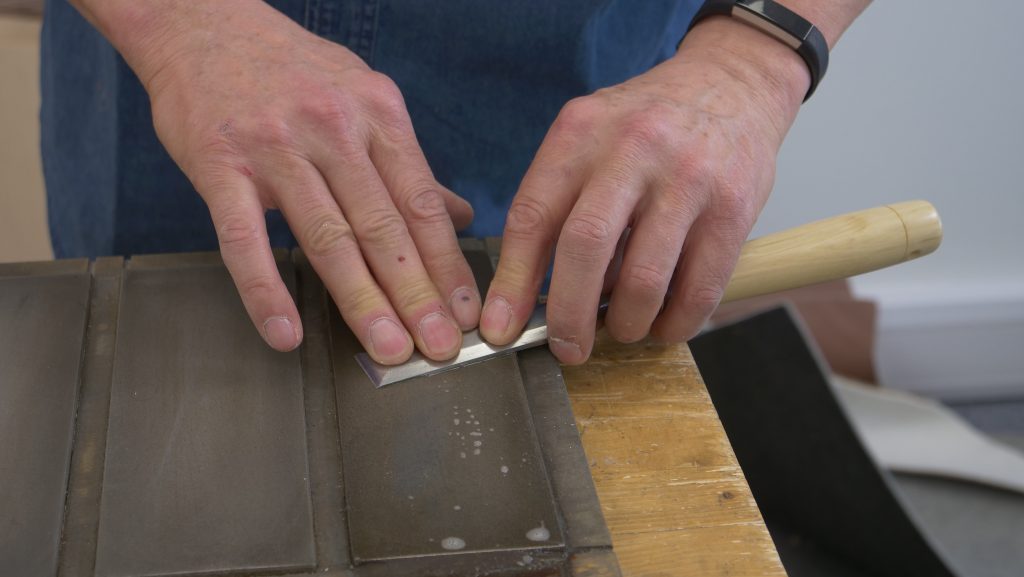
You don’t need to flatten the whole face of the chisel, as long as it reaches the part behind and into the cutting edge itself. Work your way through the different grades of your sharpening plates starting with the coarse level. For the fine grade (the mid grade), place the blade on the plate lengthways with the handle pointing towards to your body, this is to stop the handle resting on the diamond plates either side and abrading away. Move your body to the side and press the blade using your fingers. Use the wooden side of your strop to polish and remove any remaining abrasions. Place your block of ply in the vise with the wooden side facing up. Rub the buffing compound into the wood generously to cover the surface of your block, the wax contains very fine particulate which is the abrasive that finally polishes the flat face of the chisel. Rub the flat face of the chisel back and forth, you might notice the strop starting to blacken as it polishes the chisel. This is natural as the abrasive is abrading steel that changes the colour of the compound. Clean off excess compound on the chisel with a cloth or tissue, if it is stubborn you can use fine steel wool.
Setting Up Gallery:
Sharpening
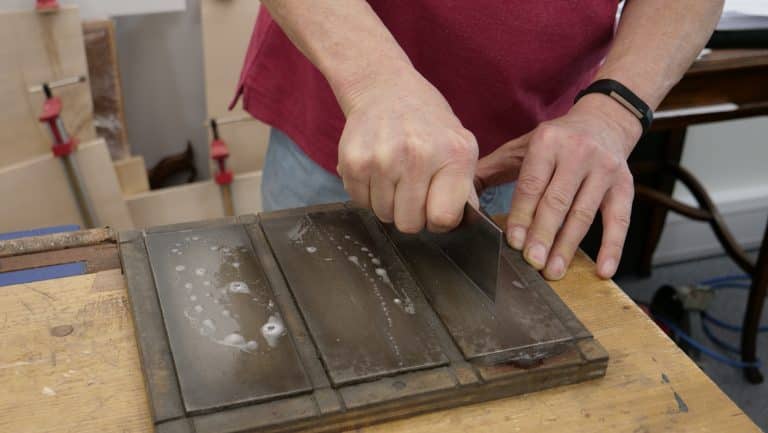
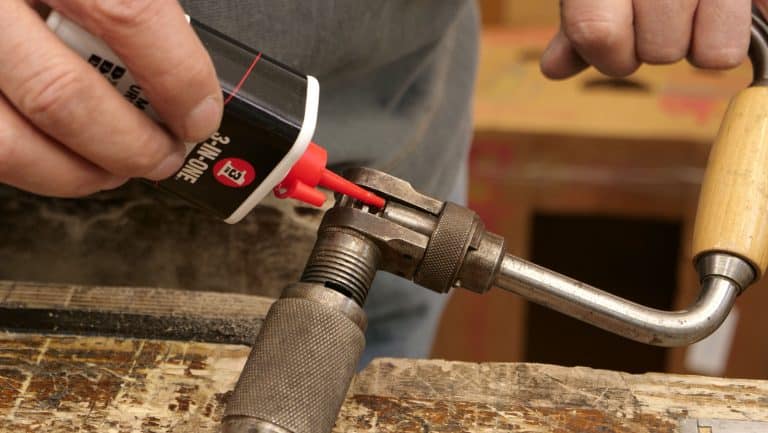
To sharpen the bevel, spray auto-glass cleaner onto your steel sharpening plates, one pump on each plate is usually enough. This is used instead of water as water tends to leave rust residue on the plates.
Place the chisel with the bevel of the chisel face down on the coarse plate. Apply an even pressure on the bevel end of the chisel and push and pull it along the plate repeatedly, moving evenly across the width of the sharpening plate about 10 times lengthways in each stroke. Start the stroke with the chisel at approximately 30° and end each stroke you make between 20-25°. This will create a gentle camber from the cutting edge of the bevel to the heel. This level of sharpening on the coarse plate requires the most work as this is where most of the abrasion takes place.
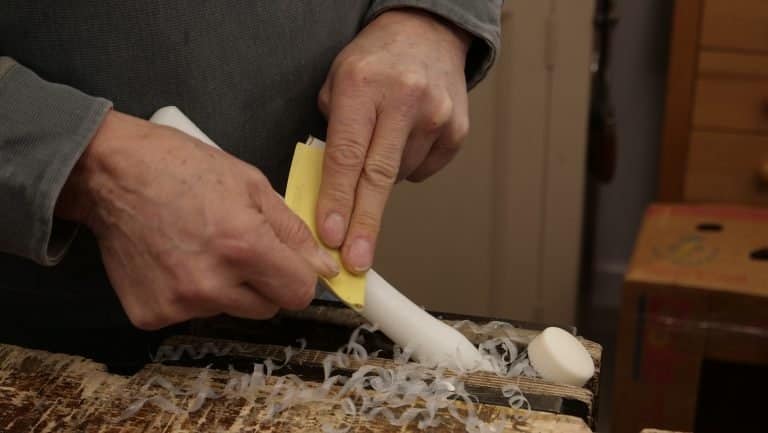
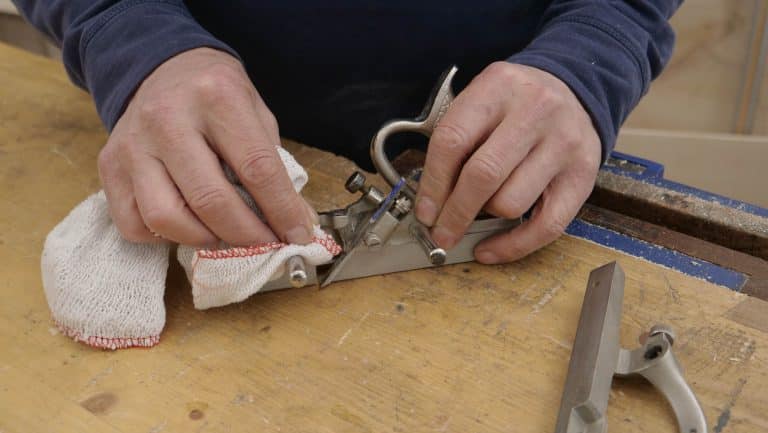
Repeat the previous steps on the finer, mid-level plate, then the super-fine plate. This will continue to rub away the abrasions and a burr will form at the cutting edge of the bevel. You will be able to feel the burr on the flat face side. To remove the burr, turn the chisel over so that the flat side is now pressed onto the sharpening plate. Apply pressure on the top of the chisel, with the surface on the plate, pull the chisel back (away from the cutting edge) towards you with a single pull. Pinch the burr with your fingertips and the waste steel should come off in a small strip. Use the leather side of your strop, charged with buffing compound, and place your chisel with the bevel down. Pull back firmly 30 times to polish and remove any existing abrasions. Be careful to only pull the chisel across the surface of the strop, trailing the cutting edge, as pushing into it will result in the chisel cutting into the leather. Finish off by carefully removing any wax residue with a cloth or tissue.
Sharpening Gallery:
To watch Paul’s video on sharpening chisels with diamond stones, click here.
Abrasive Paper
To set up and sharpen your chisel using abrasive paper, you will need:
- Abrasive paper strips (approximately 9 x 3 ½ Inch) 80 or 150 grit, 400, 800, 1500, 2000, 3000 (2 of each grit) or as close to these grits as you can find
- Spray adhesive
- Tile approximately 9” by 9” (229mm)
- Honing guide
- Ruler
Setting Up
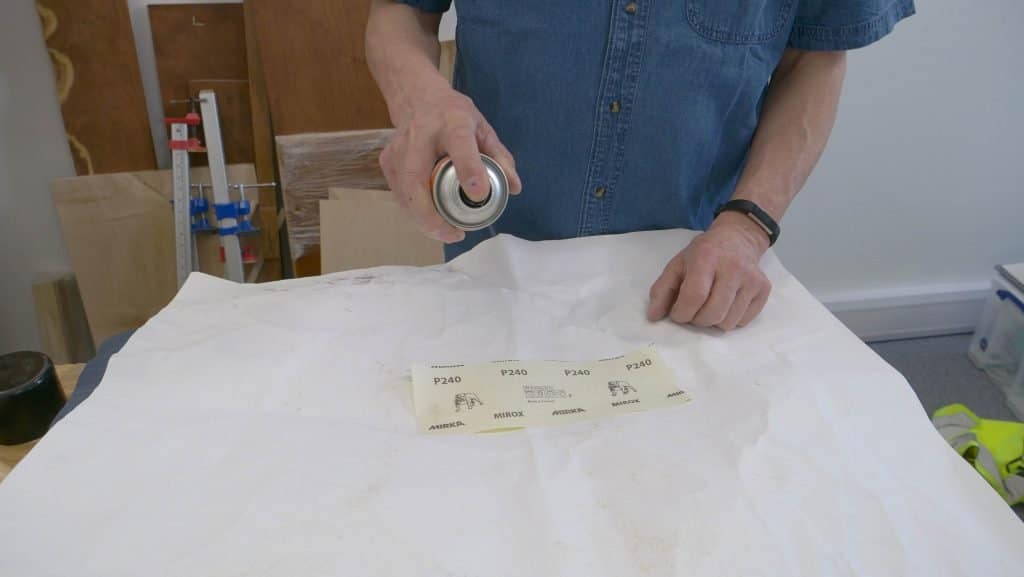
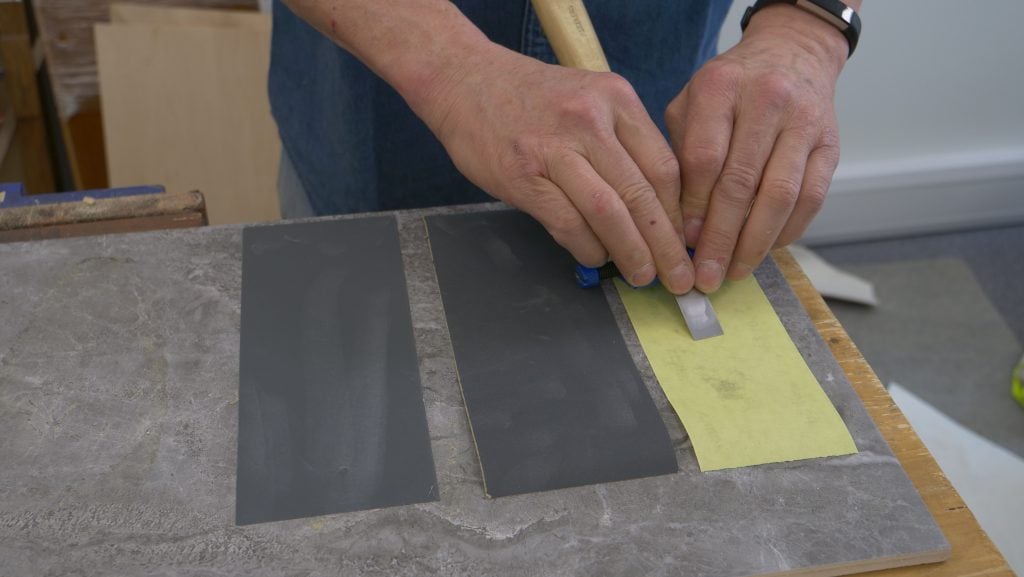
Lightly mist the back of the most coarse of your abrasive papers with spray adhesive, stick it onto your tile and press firmly. If you can fit more than one strip on, stick the next grit down onto the tile too.
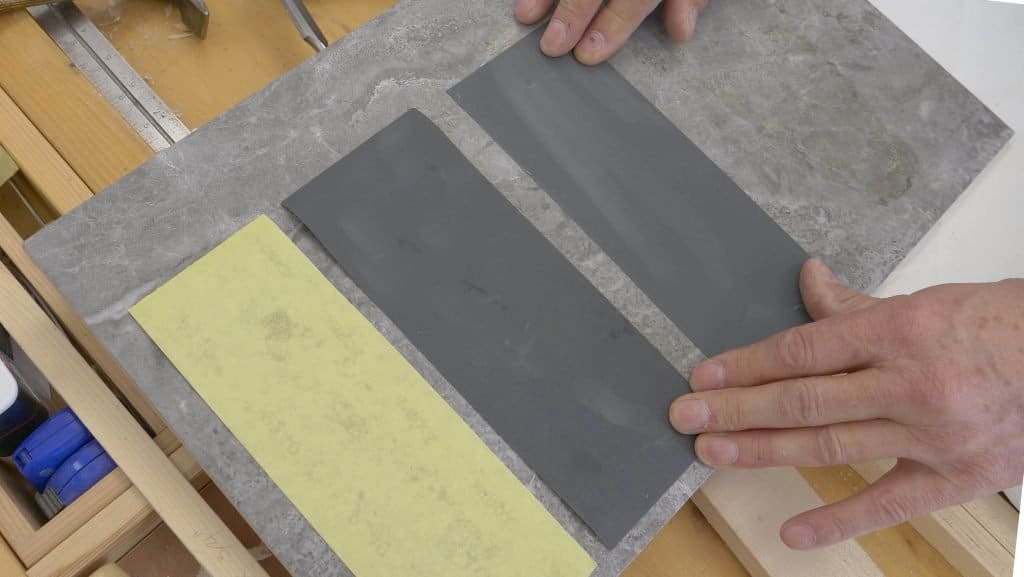
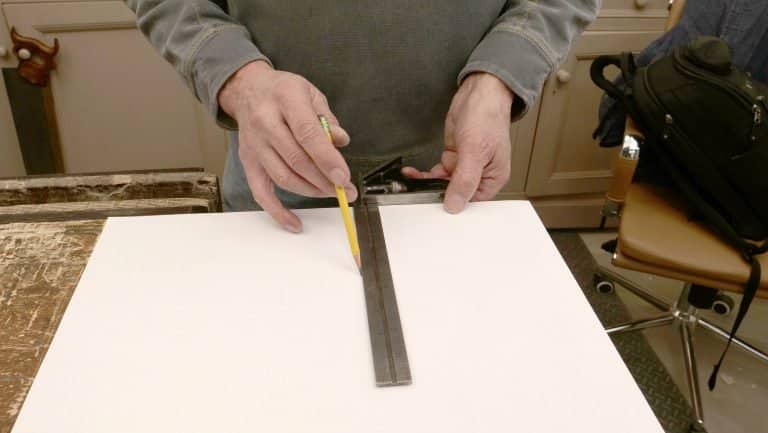
Whether you have purchased your chisels new or second hand, it is important to improve the flatness and polish the large back face of the chisel (Paul sometimes refers to this process as ‘initialising’). You need to ensure the surface you are sharpening your chisels on is truly flat, Paul suggests using a tile but check the flatness using a square as sometimes the tiles are not flat. Place the chisel flat side down and start with the most coarse grit (80 or 150), rubbing the chisel back and forth. Press down on the bolster part with one hand and use the other hand to press down the blade, being careful to keep the chisel flat on the surface. After a few strokes you can turn the chisel over and see what has been removed, if you can see that some material has been abraded in patches it proves the chisel had not yet been flattened.
You don’t need to flatten the whole face of the chisel, as long as it reaches the part behind the cutting edge and into the full width of the cutting edge itself. Work your way through the different grits of abrasive paper. Clean off excess steel on the chisel with a cloth or tissue.
Initialising Gallery:
Here you can use the wooden side of your strop to polish and remove any remaining abrasions. This isn’t a necessary step but Paul recommends it as it sharpens to a higher level. Place your block of ply in the vise with the wooden side facing up. Rub the buffing compound into the wood generously to cover the surface of your block, the wax contains very fine particulate which is the abrasive that finally polishes the flat face of the chisel. Rub the flat face of the chisel back and forth, you might notice the strop starting to blacken as it polishes the chisel. This is natural as the abrasive is abrading steel that changes the colour of the compound. Clean off excess compound on the chisel with a cloth or tissue, if it is stubborn you can use fine steel wool.
Sharpening
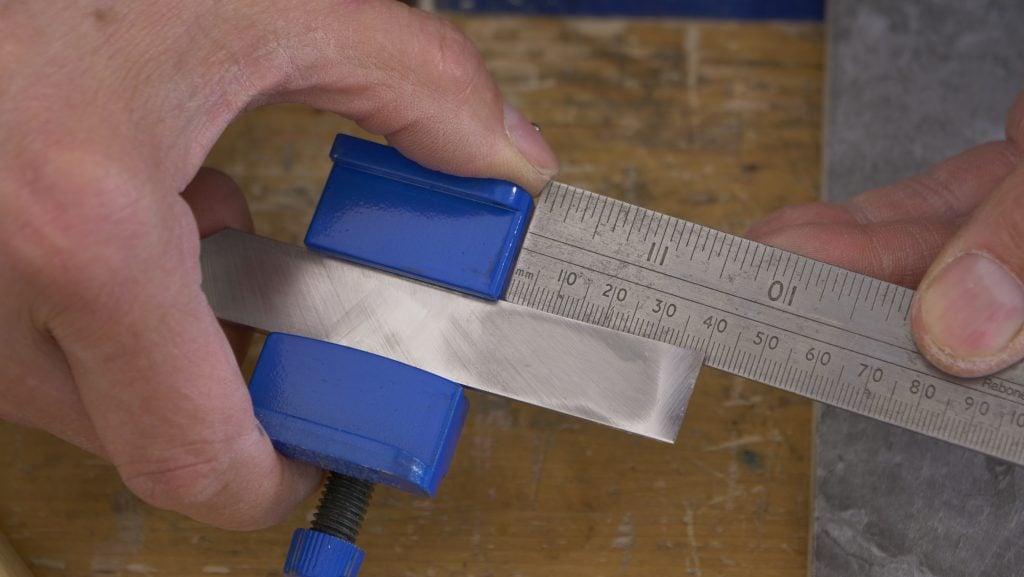
To sharpen the bevel, place the chisel in the honing guide, bevel down. To start with you want to abrade the bevel to 25°, to do this, protrude your chisel blade out the end of the honing guide by 40mm (This may be a different measurement if you use an alternative guide to the Eclipse model). If necessary use a protractor to check.
Place the chisel in the honing guide, bevel down on the coarse abrasive paper. Apply an even pressure on the honing guide and push and pull it along the paper about 10 times lengthways, moving evenly across the full width to establish the primary bevel. This level of sharpening on the coarse paper requires the most work as this is where most of the abrading takes place.
Subsequent sharpening has less to do with refinement and more to do with simple abrading of the bevel. Once you have established the bevel at 25°, adjust the chisel in the honing guide from from 40mm to 30mm and hone at the finest level of abrasive at 30°, the amount of abrading need only be 1-2mm wide. This will develop the cutting edge. Ultimately you will develop freehand skills for sharpening and this will enable you to create a gentle camber, across all 3 levels of abrasive paper, from the cutting edge of the bevel to the heel which strengthens the bevel. When sharpening, a very fine burr will form at the cutting edge of the bevel and can be felt on the flat face.
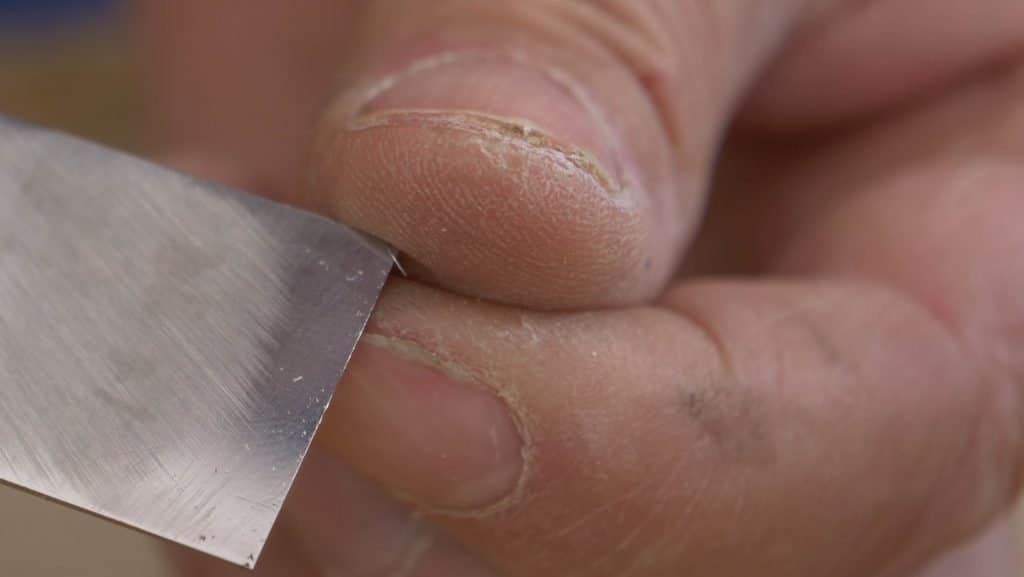
To remove this, turn the chisel over so that the flat side is now pressed onto the sharpening plate, apply pressure on the top of the chisel, with the surface dead flat on the plate, pull the chisel back towards you with a single pull. If you want to use your strop to further refine the bevel (optional), use the leather side and charge with buffing compound, place your chisel with the bevel down. Pull back firmly about 30 times to polish and remove any existing abrasions. Be careful to only pull the chisel across the surface of the strop, trailing the cutting edge, as pushing into it will result in the chisel cutting into the leather. Finish off by carefully removing any wax residue with a cloth or tissue.
Tip: If you keep your chisels inside a wrap or box you can minimise the risk of the blade getting chipped or damaged by other tools when they are not being used.
Further Reading
To read more on chisels, we recommend the following from Paul’s blog:
I have 600 and 1200 grit diamond stones only. I thought it might work if I use lower grit sand paper and than move on to diamond stones. I am using 60 and 240 grit sand paper for this. One thing that strikes me is that there is a lot of fine metal dust that forms after a few pulls on the sanding paper. It makes me wonder whether this means that my chisels are really poor quality (mine are brand new Marples, not Marples of old). Anyhow, I cannot get them to be anywhere near sharp. The only exception from Paul’s instruction is that I am using a kind of hybrid method- sand paper than diamond stones. Any ideas?
Hi Nik,
Thank you for getting in touch. I have put your questions to Paul and his answer is below:
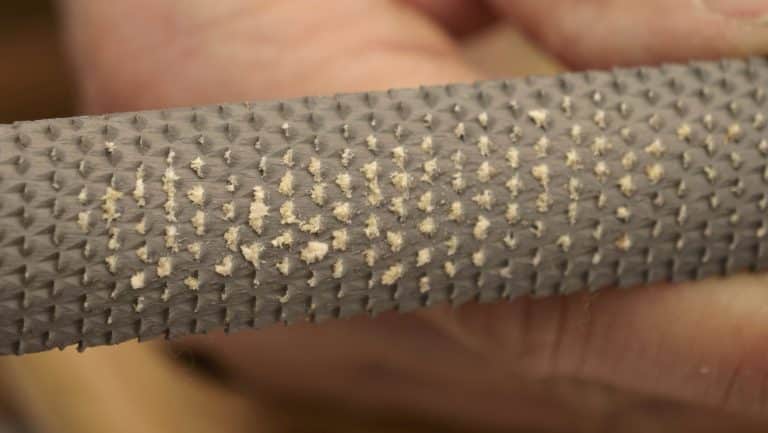
It’s fine to use abrasive paper. The reason for the powder isn’t because of the poor grade of steel, it’s because abrasive paper is highly abrasive and it fractures very quickly so you have a combination of both abrasive material and abraded steel. The longevity of abrasive paper is very short as a result and needs replacing quite quickly. There should be no reason why you’re not achieving the same levels of sharpness that Paul does. It may be that you are inconsistent with the presentation of the chisel at the same angle throughout the sharpening process if you are indeed doing this freehand. We suggest trying with a honing guide.
Kind Regards,
Izzy
While I get the chisels nice and sharp with Paul’s method, I have a really hard time applying the pressure evenly so that the sharp end is now slightly out of square with the sides. I could of course get a honing guide to correct this (does Paul recommend one?) but would prefer to stay freehand and improve my technique. Any hints what I can do? I have the same issue with a plane.
Hi Christian,
For a beginner, Paul recommends a honing guide, he uses the Eclipse, you can find out more about this at the bottom of this guide.
In regards to sharpening freehand, all it is is being self disciplined. You have to correct yourself consistently as you go.
Kind Regards,
Izzy
Hello,
During set up, how does one deal with chisel side bevels that cut skin during use? I bought a set of Axminster Rider chisels and all the side bevels cause the equivalent of paper cuts during regular use.
Is it okay to dull the side bevels slightly with sandpaper? Should I stay an inch or so away from the tip of the bevel? Perhaps there is a better solution.
Thanks in advance!
-Jon
Hi Jon,
Paul has a video somewhere that answers this. Basically your round off the sharp side edges leaving about a half inch to an 1 inch sharp on the sides near the chisel tip. The idea is to have sharp edges when dovetailing to get into tight spaces with the chisel tip. I use the diamond plates to essentially grind off the arrises on both sides of my chisel. The veritas chisels cut the heck out of my hand right in the skin between my thumb and pointer finger. Not fun!
Jeff D
Hi
I’m new, so a belated question on this
A friend of mine used to get coticule stones in Belgian Ardennes to shape and sell them world-wide. Now I was just reading some info about those stones, and it seems you can sharpen/polish on the same stone from about 1000 to about 8000 grit, depending on the blurr ( you have to make yourself by rubbing the stone with water and a smaller coticule stone ). Do you know anything bout those stones for using them to sharpen chisels and planeblades….normally they are being used for sharpening shaving knifes.. This question because I think the guy has still some lying around and I cannot afford diamond stones, so I thought it would be a great alternative…thnx in advance
Chris
btw, just did my very very first sharpening on a planeblade after seeing Paul’s video on restauring and setting up….I might say I did a good fob for a complete novice 🙂
Hi,
Paul says:
Give it a shot, yes. You have nothing to lose and creating the slurry is how the Japanese have done it for centuries.
Izzy
Hi,
How does Paul recommend squaring the cutting edge of a chisel that isn’t square? I have a honing guide but it only seems to perpetuate the problem instead of solving it.
jk
I had, unintentionally, put a little camber on my plane iron using a dished oilstone and uneven pressure. To solve it I traced a line squared to one side with a marker and, this time consciously, tried to form the 25º bevel applying more pressure where needed slowly and watching the progress until I get pretty close. Once the 25º bevel formed I started to hone at 30º to make the camber paying attention to keep even pressure and not forcing it out of square. So… basically starting again until you (I mean me) eventually get better at this.